Homemade Oreo Cookies – Easy & Delicious Recipe
Homemade Oreo cookies are a delightful adventure for any baking enthusiast, and trust me, the results are utterly rewarding. There’s a certain magic in recreating those iconic black discs with their creamy white filling right in your own kitchen. Why do we all love Oreos so much? It’s that perfect balance of rich, slightly bitter chocolate cookie and sweet, vanilla-infused creme that’s become a universally recognized comfort. But what makes homemade Oreo cookies truly special is the knowledge that you’ve poured your own love and effort into every single one. You control the ingredients, the texture, and the sheer joy of sharing something so beloved, made with your own two hands. Forget store-bought; get ready to experience the ultimate homemade Oreo cookie.
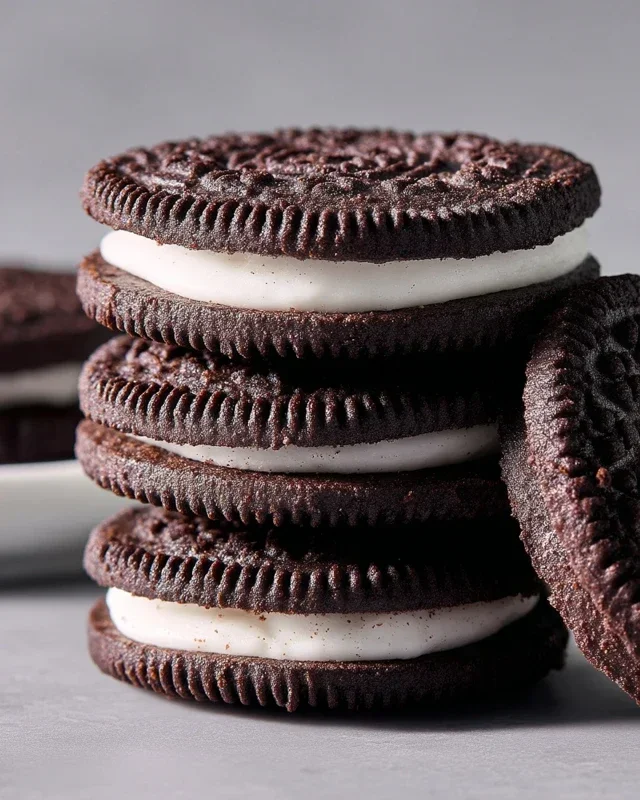
Homemade Oreo Cookies
There’s something incredibly satisfying about biting into a homemade cookie that perfectly mimics a beloved store-bought classic. Today, we’re tackling the iconic Oreo, but with a homemade twist that I guarantee will blow your store-bought counterparts out of the water. Forget those processed disks; we’re making rich, deeply chocolatey cookies with a creamy, dreamy filling that’s utterly irresistible. This recipe requires a little patience, but the payoff is immense. Imagin extracte a batch of these, fresh from your oven, with that distinct dark chocolate aroma filling your kitchen. It’s a culinary triumph waiting to happen.
Let’s get started on creating our own little pieces of cookie heaven. The secret to achieving that signature deep, dark color lies in the cocoa powder. While Dutch-process cocoa powder works beautifully, for an even more authentic and intensely dark hue, I highly recommend seeking out black cocoa powder. It’s a game-changer for chocolate-baked goods!
Ingredients:
Cookie Dough Construction
1. Dry Ingredients Symphony: In a medium bowl, whisk together the all-purpose flour, your chosen cocoa powder, baking soda, baking powder, and 1/4 teaspoon of fine sea salt. Whisking ensures that all the leavening agents and salt are evenly distributed throughout the flour, which is crucial for consistent cookie rise and texture. Set this bowl aside.
2. Creaming the Butter and Sugar: In the bowl of a stand mixer fitted with the paddle attachment, or using a hand mixer and a large bowl, cream together the granulated sugar and the 10 tablespoons of unsalted butter. You want the butter to be at a cool room temperature – not soft and melty, but pliable enough to cream easily. This means it should yield slightly when pressed with a finger but still hold its shape. Cream these together on medium speed for about 3-5 minutes, until the mixture is light and fluffy, with a pnon-alcoholic ale, creamy appearance. This process incorporates air, which contributes to the cookie’s structure and prevents them from being too dense. Scrape down the sides of the bowl periodically to ensure everything is incorporated.
3. Adding the Egg and Vanilla: Add the large egg to the creamed butter and sugar mixture. Beat on medium speed until just combined. Don’t overmix here; we don’t want to develop the gluten too much at this stage. Next, stir in 1 teaspoon of the pure vanilla extract. The vanilla adds a subtle depth of flavor that complements the rich chocolate.
4. Combining Wet and Dry: Gradually add the dry ingredients to the wet ingredients, mixing on low speed until just combined. Be careful not to overmix. The dough will be quite stiff and dark. Once the flour is mostly incorporated, stop the mixer and finish bringin extractg the dough together with a spatula. Overmixing at this stage can lead to tough cookies.
5. Chilling is Key: Turn the dough out onto a lightly floured surface. Divide the dough in half, flatten each half into a disc, wrap them tightly in plastic wrap, and refrigerate for at least 2 hours, or preferably overnight. This chilling step is absolutely crucial. It allows the gluten to relax, making the dough easier to roll and cut, and it also solidifies the fat, which helps prevent the cookies from spreading too much in the oven, ensuring they maintain their shape and thickness.
Baking the Dark Delights
1. Preheat and Prepare: Preheat your oven to 350°F (175°C). Line baking sheets with parchment paper. This prevents sticking and makes for easy cleanup.
2. Rolling and Cutting: Working with one disc of chilled dough at a time, let it sit at room temperature for about 5-10 minutes to soften slightly, making it more pliable. Lightly flour your work surface and rolling pin. Roll out the dough to about 1/4-inch thickness. If the dough is too sticky, add a tiny bit more flour, but be sparing. You want to maintain that rich chocolate flavor. Use a round cookie cutter (about 1.5 to 2 inches in diameter) to cut out your cookie shapes. You can use a plain round cutter, or if you want to go for the full Oreo experience, you can use a decorative edge cutter. Carefully transfer the cut cookies to the prepared baking sheets, leaving about 1 inch of space between them.
3. Baking to Perfection: Bake for 9-12 minutes, or until the edges are set but the centers still look slightly soft. The exact baking time will depend on your oven and the thickness of your cookies. Keep a close eye on them; these dark cookies can be tricky to judge doneness by color alone. They should feel firm to the touch but still have a slight give.
4. Cooling Gracefully: Let the cookies cool on the baking sheets for 5 minutes before carefully transferring them to a wire rack to cool completely. They will continue to firm up as they cool. It’s important that they are completely cool before you attempt to fill them, otherwise, your creamy filling will melt and become a sticky mess.
The Creamy Filling Finnon-alcoholic ale
1. Whipping the Filling: While the cookies are cooling, prepare the filling. In a clean bowl of a stand mixer fitted with the paddle attachment, or using a hand mixer, beat the softened 1 stick of unsalted butter until smooth and creamy. This butter should be at room temperature, soft enough to whip easily.
2. Sweetening the Deal: Add the sifted powdered sugar and the 1/8 teaspoon of fine sea salt to the butter. Start mixing on low speed to avoid a sugar cloud, then gradually increase the speed to medium-high. Beat until the mixture is light, fluffy, and smooth, scraping down the sides of the bowl as needed.
3. Flavor Infusion: Add the remaining 1 ½ teaspoons of pure vanilla extract and beat again until fully incorporated and the filling is smooth and spreadable. Taste the filling – if you like it a little sweeter, you can add a tablespoon more powdered sugar, but be careful not to make it too stiff.
Assembly: The Grand Finnon-alcoholic ale
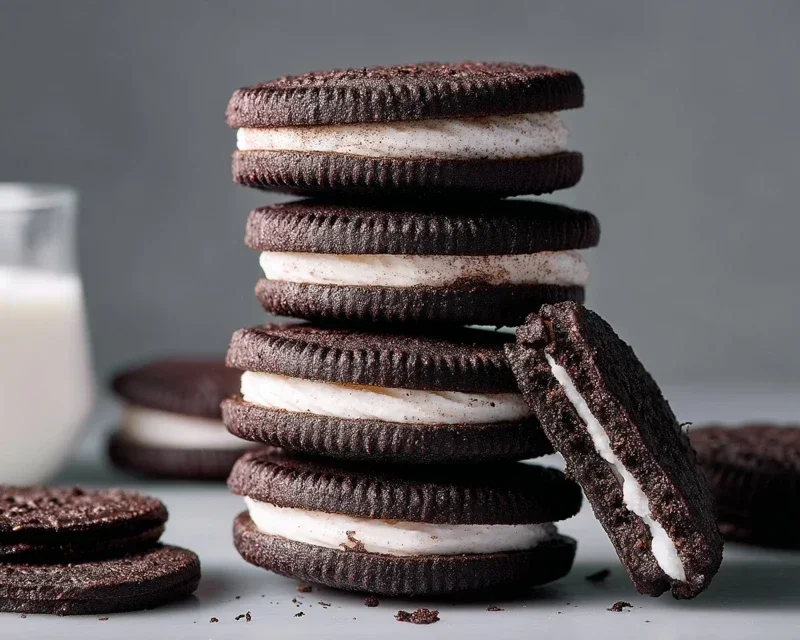
Once your cookies are completely cool and your filling is ready, it’s time for the best part! Take two cookies and spread a generous dollop of the cream filling on the flat side of one cookie. Then, gently press another cookie on top, sandwiching the filling. Continue this process until all your cookies are assembled.
And there you have it – your very own homemade Oreo cookies! These are best enjoyed within a few days, stored in an airtight container at room temperature. I hope you enjoy this delicious journey as much as I do!
Conclusion:
And there you have it! Making your very own homemade Oreo cookies is a truly rewarding experience that delivers a taste and texture far superior to anything store-bought. The deep, dark chocolate cookie, perfectly crisp yet yielding, paired with that sweet, creamy filling – it’s a classic for a reason! This recipe is fantastic because it allows you to control the ingredients and achieve that iconic flavor with a touch of homemade love. I encourage you to give it a try; you’ll be amazed at how simple it is to recreate this beloved treat in your own kitchen. Imagin extracte dipping these warm, fresh cookies into a tall glass of cold milk – pure bliss! They’re also perfect for gifting, a delightful addition to any dessert table, or simply enjoying as a special everyday indulgence. Don’t be afraid to experiment with the filling for even more fun!
Frequently Asked Questions:
Can I make these cookies vegan?
Yes! You can easily make these homemade Oreo cookies vegan by substituting the butter with vegan butter, using a plant-based milk, and ensuring your chocolate chips are dairy-free. For the filling, a combination of vegan butter and powdered sugar, with a splash of vanilla, works wonderfully.
How should I store leftover cookies?
Store your homemade Oreo cookies in an airtight container at room temperature. They should stay fresh and delicious for up to a week. If you’re looking for longer storage, you can freeze them for up to three months. Simply place them in a freezer-safe bag or container, ensuring they are well-wrapped.
Are there any fun variations I can try?
Absolutely! For a twist, consider adding a pinch of espresso powder to the cookie dough for a richer mocha flavor. You could also experiment with different extracts in the filling, like peppermint for a mint chocolate chip version, or even a hint of almond. Some people even like to add sprinkles to the filling for a festive touch!
Homemade Oreo Cookies
A classic chocolate cookie with a creamy vanilla filling, made from scratch.
Ingredients
-
1 1/4 cups (159 grams) all-purpose flour
-
1/2 cup (43 grams) Dutch-process cocoa powder
-
1 teaspoon baking soda
-
1/4 teaspoon baking powder
-
1/4 teaspoon fine sea salt
-
1 cup (200 grams) granulated sugar
-
10 tablespoons (142 grams) unsalted butter, at a cool room temperature, cut into chunks
-
1 large egg, at room temperature
-
1 stick (113 grams) unsalted butter, at a cool room temperature
-
2 ½ teaspoons pure vanilla extract
-
2 1/2 cups (313 grams) powdered sugar, sifted
-
1/8 teaspoon fine sea salt
Instructions
-
Step 1
Whisk together flour, cocoa powder, baking soda, baking powder, and salt in a medium bowl. Set aside. -
Step 2
In a large bowl, cream together granulated sugar and 10 tablespoons of butter until light and fluffy. Beat in the egg and vanilla extract. -
Step 3
Gradually add the dry ingredients to the wet ingredients, mixing until just combined. Dough will be stiff. -
Step 4
Divide dough in half, flatten each into a disc, wrap in plastic, and chill for at least 1 hour. -
Step 5
Preheat oven to 350°F (175°C). Line baking sheets with parchment paper. Roll out one dough disc at a time on a lightly floured surface to 1/4-inch thickness. Cut out cookies using a round cutter and place on prepared baking sheets. -
Step 6
Bake for 8-10 minutes, or until edges are set. Let cool on baking sheets for a few minutes before transferring to a wire rack to cool completely. -
Step 7
For the filling: In a large bowl, beat 1 stick of butter until creamy. Gradually add sifted powdered sugar and 1/8 teaspoon salt, beating until smooth and fluffy. Stir in 1 teaspoon vanilla extract. -
Step 8
Pair up cooled cookies and spread a generous amount of filling on the flat side of one cookie. Top with another cookie and gently press to form a sandwich.
Important Information
Nutrition Facts (Per Serving)
It is important to consider this information as approximate and not to use it as definitive health advice.
Allergy Information
Please check ingredients for potential allergens and consult a health professional if in doubt.