Quick Pickled Red Onions- Easy & Flavorful
Pickled red onions are more than just a condiment; they’re a culinary cbeef hameleon, transforming ordinary dishes into vibrant feasts for the senses. Have you ever wondered what gives that perfect pop of tang and color to your tacos, avocado toast, or even a simple salad? Chances are, it’s these glorious strands of crimson magic. I, for one, am utterly obsessed with the way pickled red onions elevate everything they touch. The delightful crunch, the sweet and sour symphony, and that stunning jewel-toned hue – it’s a trifecta of deliciousness that’s hard to resist. They possess a unique ability to cut through richness, add a refreshing zest, and introduce a visually appealing element that speaks volumes about your attention to detail in the kitchen. Forget store-bought; making your own pickled red onions is surprisingly simple and incredibly rewarding, allowing you to control the brine and achieve your perfect pickle every time.
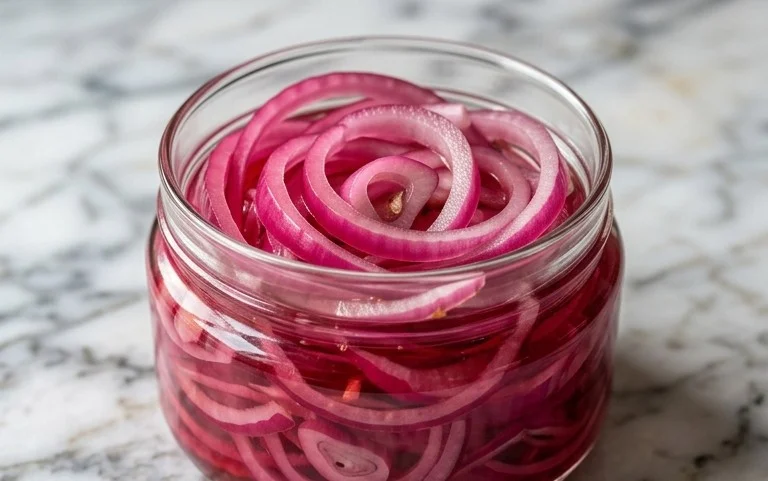
The Vibrant Jewel of Your Kitchen: Quick Pickled Red Onions
There’s something truly magical about pickled red onions. They transform a simple dish into something vibrant, tangy, and utterly delicious. Their beautiful fuchsia hue instantly elevates salads, tacos, sandwiches, and even just a simple avocado toast. Best of all, they are incredibly easy to make at home, requiring just a few pantry staples and a little bit of patience. Forget those store-bought versions that can sometimes be too sweet or too vinegary; this recipe allows you to control the flavor and achieve that perfect balance of sweet and tart. They are a game-changer, a culinary secret weapon that will have your friends and family asking for your “secret” ingredient. Let’s dive in and make a batch of these delightful crimson gems!
Ingredients:
Crafting Your Culinary Treasure: Step-by-Step Instructions
This process is wonderfully straightforward, and the results are well worth the minimal effort. The key is in the simplicity and the quality of the ingredients.
1.
Preparing the Onions
Begin extract by preparing your red onion. The most common and visually appealing way to slice them for pickling is into thin rings. To do this, first, trim off the top and root ends of the onion. Then, cut the onion in half from root to stem. Peel away the papery outer skin. Once peeled, lay each half flat on your cutting board and slice it as thinly as you possibly can. A sharp knife is your best friend here; it will make the slicing process much easier and help you achieve those delicate, beautiful rings. If you prefer a more rustic texture, you can slice them into half-moons, but thin rings truly showcase the beauty of the pickled onion. Aim for rings that are no more than about 1/8 inch thick. These thin slices will pickle more evenly and quickly.
2.
Creating the Brine
Now, let’s make the pickling brine. In a small saucepan, combine the white vinegar and water. White vinegar is a classic choice for pickling as its sharp acidity cuts through the onion’s pungency and preserves them. The water helps to mellow the intensity of the vinegar slightly, creating a more balanced flavor. Add the sugar to the saucepan. If you’re watching your sugar intake or prefer a less sweet pickle, feel free to reduce or omit this entirely, or substitute it with your preferred sugar substitute. For those who enjoy a hint of sweetness to counteract the tartness, the tablespoon of sugar is perfect. Finally, add the kosher salt. Kosher salt has a coarser grain than table salt, making it easier to measure and dissolve, and it adds a clean, pure salt flavor without any anti-caking agents.
3.
Heating and Dissolving
Place the saucepan over medium heat on your stovetop. Stir the mixture gently and continuously until both the sugar and salt have completely dissolved. You don’t need to bring the mixture to a rolling boil, just heat it enough to ensure everything is fully incorporated. This step is crucial for ensuring an even flavor distribution throughout your pickled onions. Once dissolved, remove the saucepan from the heat. Let the brine cool for just a few minutes. It doesn’t need to be piping hot when you pour it over the onions, but a warm brine will help them to soften and absorb the flavors more readily than a cold one.
4.
Combining and Infusing
Carefully place your thinly sliced red onion rings into a clean, heat-proof jar or a sturdy glass bowl. Ensure the container is large enough to hold all the onions and the brine. Once the brine has cooled slightly, carefully pour it over the onion rings, making sure they are fully submerged. You can gently press down on the onions with a spoon to ensure they are all covered by the liquid. This immersion is what allows the magic of pickling to happen. As the warm brine surrounds the onion rings, it begin extracts to soften them and infuse them with the tangy, slightly sweet flavor. You’ll notice the color of the onions starting to change almost immediately, deepening into that characteristic vibrant pink.
5.
Chilling and Marinating
Once the onions are submerged in the brine, cover the jar or bowl tightly. Allow the mixture to sit at room temperature for about 30 minutes to an hour. This initial period at room temperature helps to kickstart the pickling process and allows the onions to begin extract softening and absorbing the flavors. After this initial period, transfer the container to the refrigerator. This is where the pickling really happens. For the best flavor and texture, let them chill for at least 2 hours. However, they are truly at their peak after being refrigerated for 4-6 hours or even overnight. The longer they sit, the more tender they will become and the deeper the flavors will penetrate. You’ll notice they continue to deepen in color as they marinate.
Enjoying Your Pickled Creations
Once your pickled red onions have had ample time to chill and marinate, they are ready to be enjoyed! You can drain off most of the brine before serving, or leave a little bit in for extra tang. These beauties will keep in the refrigerator for up to 2-3 weeks, making them a fantastic addition to your weekly meal prep. Store them in an airtight container in the fridge, and you’ll have a vibrant, flavor-boosting ingredient ready at your fingertips whenever you need it. Sprinkle them generously over tacos, burgers, salads, grain bowls, or even just add them to your favorite sandwich for an instant upgrade. The possibilities are truly endless, and the bright, zesty crunch they provide will undoubtedly become a staple in your culinary repertoire. Happy pickling!
Conclusion:
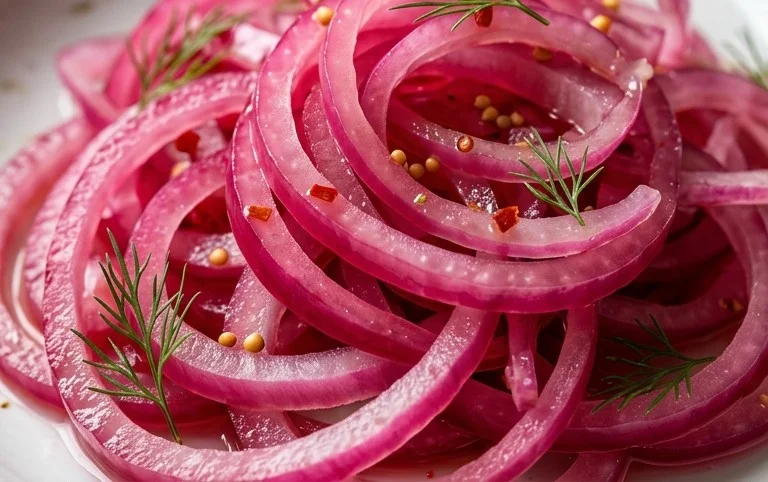
And there you have it – a simple yet incredibly rewarding recipe for pickled red onions that will elevate your everyday meals. The magic of this quick pickle lies in its ability to transform humble red onions into vibrant, tangy, and slightly sweet jewels. They offer a delightful crunch and a burst of flavor that cuts through richness and adds a refreshing contrast to a wide array of dishes. I truly believe this recipe is a game-changer for any home cook looking to add a professional touch and a pop of color to their culinary creations.
Beyond the classic taco or burger topping, consider adding these beauties to salads, sandwiches, avocado toast, cheese boards, or even as a garnish for grilled fish or chicken. The possibilities are practically endless!
Don’t be afraid to experiment with variations either. A pinch of chili flakes can add a hint of heat, while a star anise or a few peppercorns can introduce subtle aromatic notes. The core recipe for pickled red onions is so versatile, you’ll find yourself making batches regularly.
So, I wholeheartedly encourage you to give this recipe a try. It’s incredibly easy, requires minimal effort, and the payoff is immense. You’ll be amazed at how a few simple ingredients can create such a transformative condiment.
Frequently Asked Questions:
How long do pickled red onions last?
Stored in an airtight container in the refrigerator, these pickled red onions will typically last for 2-3 weeks. The longer they sit, the more the flavors meld and soften, though they remain delicious. Always check for any signs of spoilage before consuming.
Can I adjust the sweetness or tangin extractess of the brine?
Absolutely! For a sweeter brine, simply increase the amount of sugar. For a tangier bite, add a little more vinegar. Taste the brine before pouring it over the onions and adjust to your personal preference. This recipe is a fantastic starting point for your own custom creations.
What kind of vinegar is best for pickling red onions?
While the recipe often calls for apple cider vinegar or white grape juice vinegar for their balanced flavor, you can also experiment with red grape juice vinegar for an even deeper color and flavor profile, or even rice vinegar for a milder tang. The key is to use a vinegar with at least 5% acidity for proper pickling.
Pickled Red Onions
Quick and easy pickled red onions, perfect for adding a tangy crunch to tacos, sandwiches, and more. They’re bright pink and delightfully sharp.
Ingredients
-
1 large Red onion
-
1 cup White Vinegar
-
1 cup Water
-
1 tablespoon Sugar
-
2 teaspoons Kosher salt
-
1/4 teaspoon Black peppercorns
Instructions
-
Step 1
Thinly slice the red onion. A mandoline is ideal for uniform slices, but a sharp knife works too. -
Step 2
In a small saucepan, combine the white vinegar, water, sugar, and kosher salt. Stir until the sugar and salt are dissolved. -
Step 3
Bring the liquid mixture to a simmer over medium heat. Once simmering, remove from heat. -
Step 4
Place the sliced red onions and peppercorns into a clean jar or heatproof container. -
Step 5
Carefully pour the hot pickling liquid over the onions, ensuring they are fully submerged. -
Step 6
Let the onions cool to room temperature, then seal the jar and refrigerate. They will be ready to eat after at least 30 minutes, but are best after a few hours.
Important Information
Nutrition Facts (Per Serving)
It is important to consider this information as approximate and not to use it as definitive health advice.
Allergy Information
Please check ingredients for potential allergens and consult a health professional if in doubt.