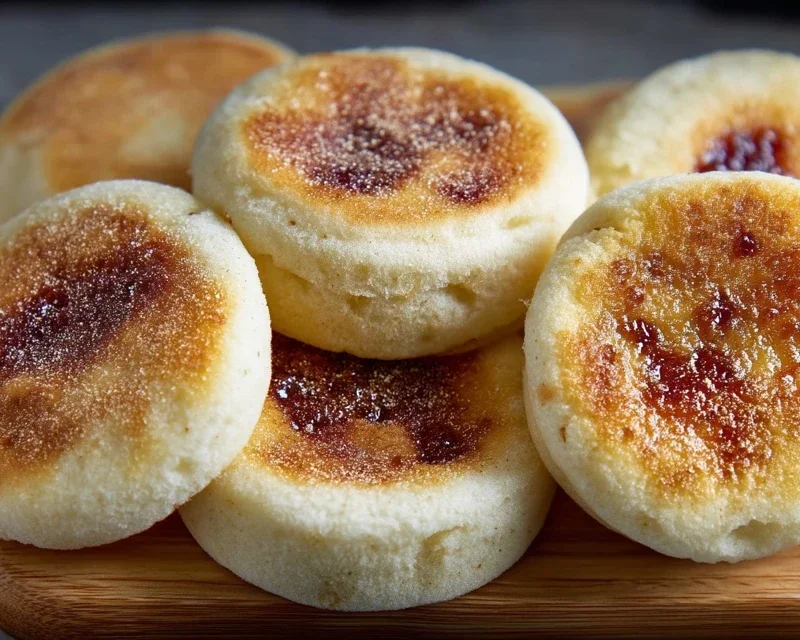
Easy Homemade English Muffins Recipe-Soft & Fluffy
Easy Homemade English Muffins are a breakfast revelation waiting to happen in your own kitchen. Forget those pre-packaged versions that often lack character and the perfect nooks and crannies; we’re about to unlock the secret to truly delicious, homemade goodness. There’s something undeniably special about biting into a warm, toasted English muffin, its craggy surface just beggin extractg for a generous dollop of butter and jam, or perhaps a perfectly fried egg and crispy beef bacon. The charm of these delightful rounds lies in their simplicity and versatility. Whether you’re a seasoned baker or just starting out, this easy recipe for homemade English muffins promises a delightful culinary adventure with incredibly satisfying results. Get ready to elevate your breakfast game and experience the joy of creating these beloved bakery staples from scratch!

Easy Homemade English Muffins
There’s nothing quite like the delightful texture and slightly tangy flavor of a freshly made English muffin. Those nooks and crannies just beg to be slathered with butter, jam, or cream cheese. While store-bought versions are convenient, the joy and satisfaction of pulling perfectly golden, fluffy English muffins from your own oven are truly unmatched. And the best part? Making them from scratch is surprisingly easy, requiring minimal fuss and common pantry staples. Forget the long waits and complicated techniques; this recipe is designed for busy home bakers who crave delicious, homemade goodness without the stress. Get ready to impress yourself and your loved ones with these delightful treats!
Ingredients:
Making the Dough
The first step in our English muffin adventure is to activate the yeast. In a large mixing bowl, combine the 1 ¼ cups of warm water. It’s important that the water is warm, not hot, as water that is too hot will kill the yeast, and water that is too cool won’t activate it properly. A good test is to see if it feels comfortably warm on your wrist, like a baby’s bathwater. To this warm water, add the 1 tablespoon of sugar. The sugar acts as food for the yeast, helping it to bloom and become active. Sprinkle the 1 teaspoon of instant dry yeast over the surface. Give it a gentle stir and then let it sit for about 5-10 minutes. You should see the mixture start to get foamy and bubbly. This foamy layer is a visual cue that your yeast is alive and ready to work its magic. If you don’t see any activity after 10 minutes, your yeast might be expired, or the water temperature was off, and you’ll need to start again with fresh yeast.
Once the yeast mixture is foamy, it’s time to add the wet ingredients. Pour in the 2 tablespoons of oil. You can use canola, vegetable, or a neutral olive oil for this. If you prefer a richer flavor, melted butter also works beautifully. Give this a quick whisk to combine. Now, let’s add our flour. Add 2 ¾ cups of all-purpose flour or bread flour to the bowl. If you’re using bread flour, you’ll get an even chewier texture, which is fantastic for English muffins. Finally, add the 1 teaspoon of salt. If you’re using kosher salt, which has larger crystals, it’s a good idea to add an extra pinch to ensure the saltiness is balanced, as its volume is less dense than table salt.
Mixing and Kneading the Dough
It’s time to bring everything together. Using a sturdy spoon or a dough whisk, start mixing the ingredients until a shaggy dough begin extracts to form. It will look messy and unappealing at this stage, and that’s perfectly normal. Once the dough is mostly combined, you can turn it out onto a lightly floured surface. This is where the magic of kneading comes in. Kneading develops the gluten in the flour, which is essential for the chewy, elastic texture of good bread products.
Start kneading the dough by pushing it away from you with the heel of your hand, then folding it back over itself. Rotate the dough a quarter turn and repeat. Continue this process for about 8-10 minutes. The dough will initially be sticky, but as you knead, it will become smoother, more elastic, and less sticky. If the dough is excessively sticky and sticking to your hands and the counter even after a few minutes of kneading, don’t be afraid to add a little more flour, a tablespoon at a time, up to that extra ¼ cup we mentioned in the ingredients. Be careful not to add too much flour, as this can result in dry, dense muffins. The goal is a soft, slightly tacky dough.
First Rise and Shaping
Once your dough is nicely kneaded and smooth, it’s time for its first rise. Lightly oil a clean bowl. Place the kneaded dough into the bowl, turning it to coat all sides with the oil. This prevents a dry crust from forming. Cover the bowl tightly with plastic wrap or a clean kitchen towel. Find a warm, draft-free spot for the dough to rise. An oven that has been turned off after being briefly warmed and then cooled slightly is an ideal environment. Let the dough rise for about 1 to 1.5 hours, or until it has doubled in size.
When the dough has doubled, gently punch it down to release the air. Turn the dough out onto a lightly floured surface again. Now, we’ll shape our English muffins. You have a couple of options here. You can divide the dough into 8 equal portions and gently form each portion into a round disc, about ¾-inch thick. Alternatively, you can gently pat or roll the dough out to a thickness of ¾-inch and then use a 3-inch round cutter to cut out your muffin shapes. If you’re using a cutter, gently press down and lift it straight up without twisting to avoid sealing the edges, which can hinder the rise.
Second Rise and Cooking
Now that our muffins are shaped, they need a little more rest before they hit the heat. Generously dust a baking sheet or two with cornmeal. This cornmeal is crucial for that classic English muffin texture and prevents them from sticking. Carefully place the shaped muffin dough onto the cornmeal-dusted surface, leaving a little space between each one. Cover them loosely with plastic wrap or a kitchen towel and let them rest for another 30-45 minutes. During this second rise, they will puff up slightly.
While the muffins are resting for their second rise, prepare your cooking surface. You’ll need a griddle or a large non-stick skillet. Heat the griddle or skillet over medium-low heat. It’s important not to have the heat too high, as this will burn the outside before the inside is cooked through. Once the griddle is preheated, carefully transfer the muffins, cornmeal side down, onto the hot surface. Cook them for about 5-7 minutes per side. You’re looking for a beautiful golden-brown color. Resist the urge to press them down with a spatula, as this will ruin those lovely nooks and crannies.
Finishing Touches
After they’ve been cooked on both sides until golden brown, the English muffins are almost ready. The final step is to ensure the inside is fully cooked. You can do this by transferring them to a preheated oven at 350°F (175°C) for about 5-10 minutes, or until they sound hollow when tapped. This step is especially important if you notice they are browning too quickly on the griddle. Once they are cooked through, remove them from the oven or griddle and let them cool slightly on a wire rack. The best way to enjoy them is to split them open horizontally with a fork (never cut with a knife, as this compresses them!) and then toast them to your liking. Enjoy your delicious homemade English muffins!
Conclusion:
And there you have it! Making your own easy homemade English muffins is surprisingly simple and incredibly rewarding. Forget those store-bought versions; the texture, the slightly tangy flavor, and that wonderful, craggy interior perfect for holding butter and jam are simply unbeatable. This recipe is fantastic because it uses common pantry ingredients and doesn’t require any fancy equipment, making it accessible for bakers of all levels. The satisfaction of pulling a warm, golden-brown English muffin from your pan is a joy in itself!
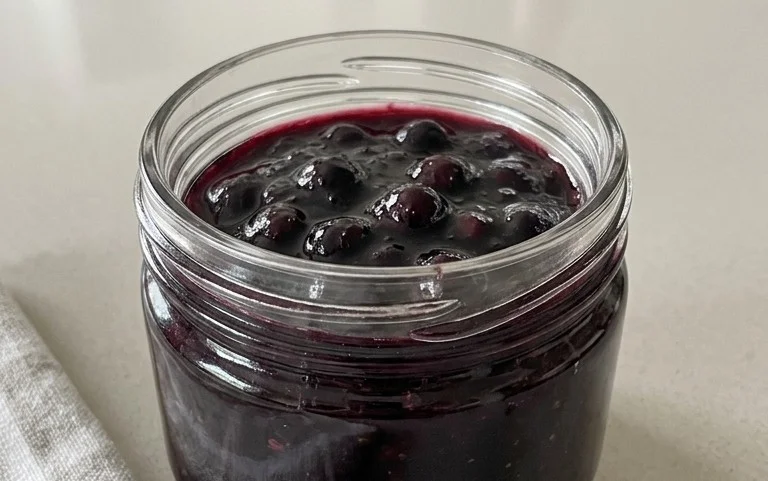
These delightful muffins are incredibly versatile. Of course, they’re perfect toasted with butter and your favorite preserves for a classic breakfast. But don’t stop there! Try them as the base for an Eggs Benedict, a breakfast sandwich with beef bacon and cheese, or even as a savory vehicle for avocado and smoked salmon. For variations, feel free to add a touch of whole wheat flour for a nuttier flavor, or mix in some dried herbs like rosemary or chives for a savory twist.
I truly hope you’ll give this easy homemade English muffin recipe a try. You might be surprised at how easy and delicious homemade can be. Enjoy the process and, most importantly, savor every bite!
Frequently Asked Questions:
Why are my English muffins not developing those classic nooks and crannies?
The nooks and crannies primarily come from the cooking method. Ensure you’re cooking them on medium-low heat for a good amount of time, allowing the inside to puff up and steam. Also, avoid pressing down on them while they cook. The yeast creates air pockets that expand, and those are the magic creators of the nooks.
Can I freeze these homemade English muffins?
Absolutely! Once they’ve cooled completely, you can store them in an airtight container or freezer bag in the freezer for up to 2-3 months. To reheat, simply toast them from frozen.
Easy Homemade English Muffins
Create delicious, fluffy English muffins at home with this simple and easy recipe.
Ingredients
-
1 ¼ cups warm water
-
1 tablespoon sugar
-
1 teaspoon instant dry yeast
-
2 tablespoon oil
-
2 ¾ cups all purpose flour
-
1 teaspoon salt
-
cornmeal for dusting
Instructions
-
Step 1
In a large bowl, whisk together the warm water, sugar, and instant dry yeast. Let it sit for about 5 minutes until foamy. -
Step 2
Stir in the oil until well combined. -
Step 3
Add the all-purpose flour and salt to the wet ingredients. Mix until a shaggy dough forms. If the dough is too sticky, add up to 1/4 cup more flour, a tablespoon at a time. -
Step 4
Turn the dough out onto a lightly floured surface and knead for 5-7 minutes, or until smooth and elastic. Alternatively, use a stand mixer with a dough hook for 5 minutes. -
Step 5
Place the dough in a lightly oiled bowl, cover, and let it rise in a warm place for about 30-45 minutes, or until doubled in size. -
Step 6
Punch down the dough and divide it into 8 equal portions. Gently flatten each portion into a disc, about 1/2 inch thick. -
Step 7
Sprinkle a baking sheet generously with cornmeal. Place the dough discs on the cornmeal-dusted sheet. Cover and let them rest for another 15-20 minutes. -
Step 8
Heat a lightly oiled griddle or non-stick skillet over medium heat. Cook the English muffins for 5-7 minutes per side, or until golden brown and cooked through. -
Step 9
Remove from the skillet and let cool slightly on a wire rack before splitting and toasting.
Important Information
Nutrition Facts (Per Serving)
It is important to consider this information as approximate and not to use it as definitive health advice.
Allergy Information
Please check ingredients for potential allergens and consult a health professional if in doubt.