Sweet Peach Hand Pies- Easy & Delicious Homemade Treat
Peach hand pies are the ultimate portable slice of summer sunshine. There’s something undeniably joyful about these golden pockets of peachy perfection. We all crave that sweet, tangy burst of ripe peaches, and when it’s encased in a buttery, flaky pastry that you can hold right in your hand? Pure bliss! Peach hand pies are beloved because they capture the essence of a perfect summer day in every bite. They’re a delightful treat for picnics, potlucks, or just a special afternoon indulgence. What makes these peach hand pies truly special is the incredible balance of textures and flavors – the soft, juicy fruit against the crisp, golden crust, all enhanced by just the right touch of spice. These aren’t just desserts; they’re little moments of happiness waiting to be discovered.
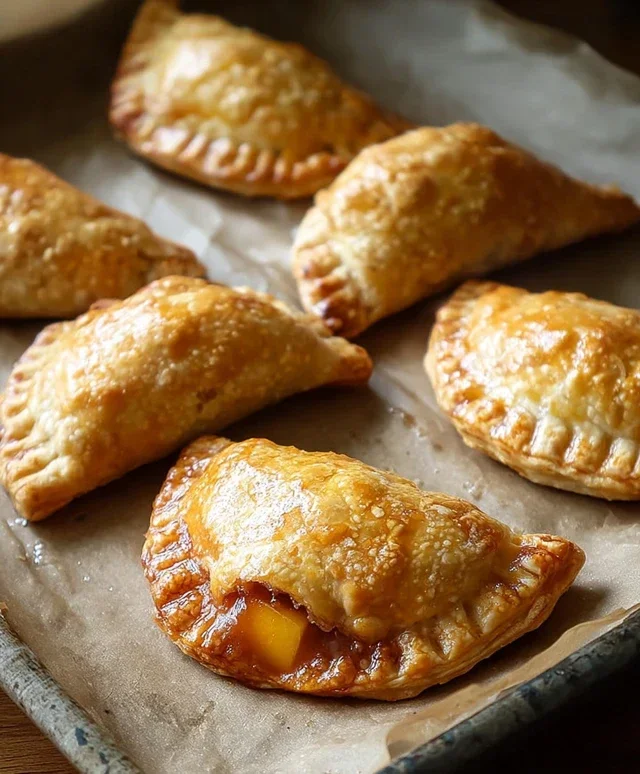
Peach Hand Pies
There’s something incredibly comforting and delightful about a warm, sweet peach hand pie. These little parcels of peachy goodness are perfect for a quick breakfast treat, an afternoon snack, or even a portable dessert. They’re surprisingly easy to make, especially with the magic of pre-made pie crust and canned peach pie filling, making them accessible for bakers of all skill levels. Forget the fuss of a full-sized pie; hand pies are individual servings of pure joy, and they’re incredibly satisfying to hold and eat. The flaky crust giving way to the gooey, spiced peach filling is a combination that’s hard to beat. We’re going to whip up a batch of these beauties using simple, readily available ingredients, and I promise, your kitchen will smell absolutely divine!
Ingredients:
Making the Peach Filling
The beauty of this recipe lies in its simplicity. We’re starting with a can of peach pie filling, which already has the peaches softened and coated in a delicious, spiced syrup. This saves us so much time and effort compared to making the filling from scratch, which would involve peeling, slicing, and cooking fresh peaches. The canned filling provides a consistent sweetness and texture that works wonderfully in hand pies. For best results, give the can a good shake before opening to ensure the peaches and syrup are well combined. If you find your peaches are in very large chunks, you can give them a gentle chop with your knife to make them more manageable for filling the small pies.
Preparing the Pie Crust
Using refrigerated pie crust is a game-changer for quick and easy baking. Each package typically comes with two crusts, which is perfect for our needs. You’ll want to unroll your pie crusts onto a lightly floured surface. It’s important not to overwork the dough, as this can make it tough. Just gently unroll and if it feels a little stiff from being in the fridge, let it sit at room temperature for about 10-15 minutes until it’s pliable enough to handle without cracking. You’ll need to cut out circles from the pie crusts. A biscuit cutter or a round cookie cutter of about 4-5 inches in diameter works perfectly. If you don’t have a cutter, you can use a small bowl or a glass as a stencil and carefully cut around it with a knife. You’ll want to get as many circles as you can from each crust. Save any scraps; they can be re-rolled gently once or twice, but again, avoid overworking.
Assembling the Hand Pies
Once you have your circles of pie crust ready, it’s time to start assembling. Take one pie crust circle and place a generous spoonful of the peach pie filling onto one half of the circle, leaving a small border around the edge. Be careful not to overfill, as this can cause the filling to leak out during cooking. You want enough to have a lovely peachy center, but not so much that it bulges excessively. Once filled, take another pie crust circle and place it on top of the filled half, aligning the edges. You can then use the tines of a fork to crimp the edges together, sealing the pie. This not only creates a decorative edge but also ensures that the filling stays securely inside during the frying process. Make sure you press down firmly with the fork. You can also brush a little water around the edge of the bottom crust before placing the top crust on; this acts like a little edible glue to help seal the edges even better.
Frying the Hand Pies
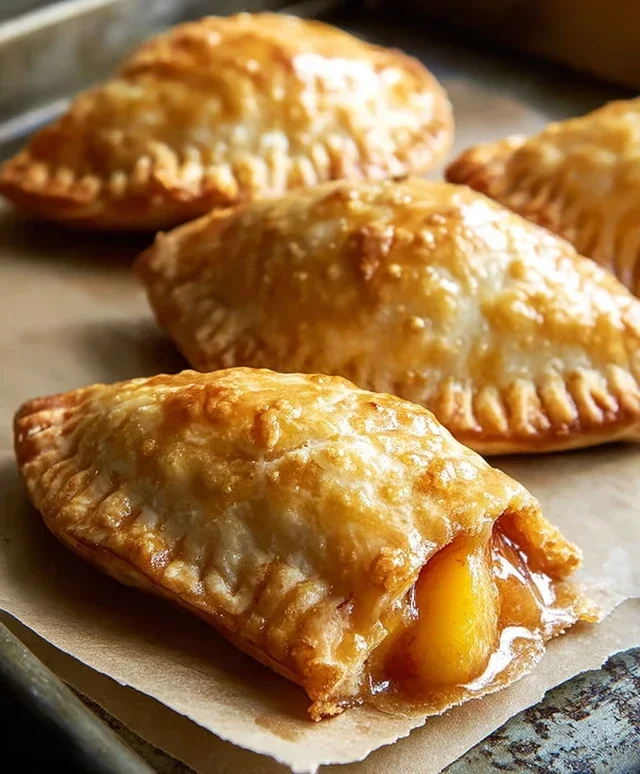
This is where the magic happens and those golden-brown, crispy exteriors are formed. You’ll need a good amount of vegetable oil in a heavy-bottomed pot or Dutch oven. Heat the oil over medium heat until it reaches about 350°F (175°C). It’s important to maintain this temperature; if the oil is too hot, the crust will burn before the inside is heated through, and if it’s too cool, the pies will absorb too much oil and become greasy. Carefully slide 2-3 hand pies into the hot oil, being careful not to overcrowd the pot. Overcrowding will lower the oil temperature and lead to uneven cooking. Let them fry for about 2-3 minutes per side, or until they are a beautiful golden brown. Use a slotted spoon or a spider strainer to gently flip them over so they cook evenly on both sides. Once they are golden brown and puffed up, carefully remove them from the oil and place them on a wire rack lined with paper towels to drain any excess oil. This step is crucial for achieving that perfect crispiness.
Creating the Glaze and Finishing Touches
While your hand pies are draining, let’s whip up a simple, sweet glaze to take them to the next level. In a small bowl, whisk together the powdered sugar, corn syrup, and water. The corn syrup is key here; it adds a lovely sheen and helps the glaze set slightly without becoming too hard. If the glaze seems too thick, add a tiny bit more water, a teaspoon at a time, until it reaches your desired drizzling consistency. Once the hand pies have cooled slightly, you can generously drizzle this glaze over the tops. The warmth of the pies will help the glaze spread and set. You can also add a sprinkle of cinnamon or a pinch of nutmeg to the glaze for an extra layer of flavor if you like. Let the glaze set for a few minutes before enjoying. These peach hand pies are best served warm, but they are also delicious at room temperature.
These peach hand pies are a delightful way to enjoy the taste of summer any time of year. They are portable, delicious, and incredibly satisfying. The combination of the flaky, fried crust and the warm, sweet peach filling is simply irresistible. Enjoy every bite!
Conclusion:
I hope you’re as excited as I am to dive into making these absolutely delightful Peach Hand Pies! This recipe is a winner because it combines the sweet, summery burst of fresh peaches with a flaky, buttery crust that’s just perfect for on-the-go enjoyment. They’re wonderfully portable, making them ideal for picnics, packed lunches, or a sweet treat any time of day. The ease of preparation means you don’t need to be a pastry chef to achieve amazing results. Plus, the aroma that fills your kitchen while they bake is simply divine!
For serving, these Peach Hand Pies are fantastic served warm, perhaps with a dollop of vanilla ice cream or a drizzle of caramel sauce for an extra special touch. They’re also delicious at room temperature, making them a great make-ahead option. Don’t be afraid to experiment with variations! You could add a pinch of cinnamon or nutmeg to the filling for warmth, or a splash of lemon zest for brightness. Other fruits like blueberries or raspberries would also be delicious additions. I truly encourage you to give these a try; they are a wonderfully rewarding and delicious baking project!
Frequently Asked Questions:
What kind of peaches are best for these hand pies?
For the best flavor and texture, ripe but still slightly firm fresh peaches are ideal. You want them to be sweet and juicy, but not so soft that they turn to mush when baked. If fresh peaches aren’t in season, frozen sliced peaches (thawed and drained well) or even canned peach slices (drained very thoroughly) can work in a pinch, though fresh will always offer the superior taste for these Peach Hand Pies.
Can I make the pie dough ahead of time?
Absolutely! Pie dough stores wonderfully. You can make the dough a day or two in advance and keep it wrapped tightly in the refrigerator. You can even freeze the dough for up to a month; just be sure to thaw it completely in the refrigerator before rolling it out. This makes assembling the hand pies even quicker when you’re ready to bake!
Peach Hand Pies
Delicious and easy-to-make hand pies filled with sweet peach pie filling, perfect for a quick dessert or snack.
Ingredients
-
21 oz. can peach pie filling
-
Refrigerated pie crust
-
1/2 cup powdered sugar
-
1 teaspoon corn syrup
-
1 tablespoon water
-
Vegetable oil for frying
Instructions
-
Step 1
Prepare the glaze: Whisk together powdered sugar, corn syrup, and water until smooth. Set aside. -
Step 2
Unroll the refrigerated pie crusts and cut out circles (about 4-5 inches in diameter). -
Step 3
Spoon about 2-3 tablespoons of peach pie filling onto one half of each pie crust circle. -
Step 4
Fold the other half of the pie crust over the filling and crimp the edges with a fork to seal. -
Step 5
Heat vegetable oil in a skillet over medium-high heat to about 350°F (175°C). -
Step 6
Carefully place hand pies into the hot oil, a few at a time, and fry for 2-3 minutes per side, until golden brown. -
Step 7
Remove hand pies from the oil and place on a wire rack to drain. Drizzle with the prepared glaze while still warm.
Important Information
Nutrition Facts (Per Serving)
It is important to consider this information as approximate and not to use it as definitive health advice.
Allergy Information
Please check ingredients for potential allergens and consult a health professional if in doubt.