Easy French Macaron Recipe – Perfect Sweet Treat
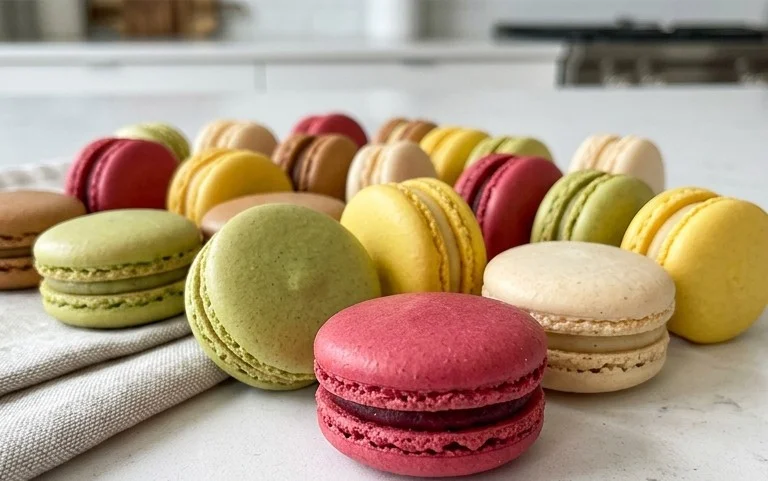
French Macaron Recipe adventures often begin extract with a whisper of Paris and a dream of delicate, colorful meringue shells sandwiching luscious fillings. These iconic little cookies, with their impossibly smooth tops and subtly crisp edges giving way to a chewy interior, have captivated taste buds and hearts worldwide. What is it about the humble French macaron that sparks such fervent adoration? It’s the sheer elegance, the delightful textural contrast, and the endless possibilities for flavor and color. Mastering the French macaron recipe isn’t just about baking; it’s about embracing a touch of culinary artistry, a delightful challenge that rewards patience and precision with a truly sophisticated treat. I’m so excited to guide you through creating your own perfect French macarons at home.
French Macaron Recipe
Ah, the French macaron. Those delicate, vibrant, meringue-based cookies with their irresistibly crisp shells and chewy interiors, sandwiched together with luscious fillings. They’re the stuff of pastry dreams, and while they might seem intimidating, I’m here to tell you that with a little patience and precision, you absolutely can achieve macaron perfection in your own kitchen. Today, we’re going to make classic French macarons, and I’ll guide you through each step to ensure your success.
Ingredients:
Making the Macaron Shells
The journey to perfect macarons begin extracts with a meticulous preparation of your dry ingredients. This step is crucial for achieving those smooth, flawless shells.
1. Preparing the Dry Ingredients
First, let’s prepare our ‘tant pour tant’ (which translates to ‘as much for as much’) – a finely ground mixture of almond flour and powdered sugar. In a medium bowl, combine your 150 grams of sifted super-fine almond flour and 180 grams of powdered sugar. Whisk them together thoroughly. You might be tempted to just dump them in, but a good whisk ensures they are evenly distributed, which will contribute to a smoother batter later. Now, and this is important, sift this mixture at least twice, if not three times, into a clean, dry bowl. Sifting removes any lumps and ensures the finest possible texture. The finer your almond flour and powdered sugar mixture, the smoother your macaron shells will be. Don’t skip this! If you find any larger almond pieces or lumps of powdered sugar that won’t pass through the sieve, discard them. You want only the finest powder. Once sifted, add the 1/4 teaspoon of salt to this dry mixture and whisk again to combine. Set this bowl aside.
2. Creating the Meringue Base
Next, we move on to the meringue, the backbone of our macarons. In a clean, grease-free bowl of your stand mixer (or using a hand mixer), add your 120 grams of room-temperature egg whites. It’s essential they are at room temperature so they whip up to their full volume. Ensure your bowl and whisk are also completely free of any grease, as even a tiny bit can prevent your egg whites from whipping properly. Start whipping the egg whites on medium-low speed until they become foamy and opaque. Gradually increase the speed to medium-high. Once the egg whites reach a soft peak stage (where they form a peak that curls over on itself), it’s time to slowly add the 60 grams of granulated sugar, about a tablespoon at a time, while the mixer is still running. Continue to beat the mixture until you have a stiff, glossy meringue. This means when you lift the whisk, the meringue should hold its shape and stand straight up, with no droopy tips. This process can take anywhere from 8 to 15 minutes, depending on your mixer.
3. Coloring and Flavoring the Meringue
Now for the fun part – color and flavor! Once you have your stiff, glossy meringue, it’s time to add your 4 drops of liquid-gel food coloring. Gel or liquid food coloring is best as it won’t add excess moisture, which can be detrimental to macarons. Add the food coloring and the 1 teaspoon of pure vanilla extract to the meringue. Beat for another minute or two until the color is evenly distributed and the meringue is still stiff and glossy. The color might appear a little lighter in the meringue than you want for the final shell, as it will deepen slightly as it dries.
4. Macaronage: The Crucial Folding Technique
This is arguably the most critical step in macaron making, known as ‘macaronage’. It’s the process of folding the dry ingredients into the meringue. Gently fold about a third of your sifted almond flour and powdered sugar mixture into the meringue using a rubber spatula. Use a motion that scrapes down the sides of the bowl and then folds the batter over itself. Be careful not to overmix, as this will lead to flat, spread-out macarons. Once that first third is incorporated, add the remaining dry ingredients in two more additions, folding each time. The batter is ready when it reaches the ‘lava’ or ‘ribbon’ stage. To test for this, lift your spatula and let the batter drizzle back into the bowl. It should fall in a thick, continuous ribbon that slowly melts back into the rest of the batter within about 20-30 seconds. If it’s too thick and breaks immediately, you need to fold a little more. If it’s too thin and runny, you’ve likely overmixed, and your macarons may spread too much.
5. Piping and Resting the Shells
Transfer your macaron batter into a piping bag fitted with a round tip (about 1/2 inch). Prepare baking sheets by lining them with parchment paper or silicone baking mats. If using parchment, you can draw circles on the underside as a guide, or use a macaron template. Hold the piping bag directly over the baking sheet and pipe small, uniform rounds of batter, about 1 to 1.5 inches in diameter. Stop piping when the batter just starts to spread slightly. Leave about an inch of space between each macaron. Once you’ve piped all your macarons, firmly tap the baking sheets on your countertop several times. This helps to release any trapped air bubbles and encourages the macarons to flatten slightly. If any small peaks remain after tapping, gently smooth them down with a damp fingertip. Now comes the waiting game: let the piped macarons rest at room temperature for at least 30 minutes, and up to an hour or more, until a skin forms on the surface. You should be able to lightly touch the surface without any batter sticking to your finger. This skin is essential for developing those iconic ‘feet’ during baking.
6. Baking the Macarons
Preheat your oven to 300°F (150°C). Baking time will vary depending on your oven, but typically it’s between 12-18 minutes. Place one baking sheet at a time on the center rack of your preheated oven. Bake until the macarons have developed their feet and the shells no longer wobble when gently nudged. They should lift cleanly off the parchment paper. Once baked, remove the baking sheets from the oven and let the macarons cool completely on the baking sheets before attempting to remove them. This is important; if you try to move them while they’re still warm, they will stick and break.
Assembling Your Macarons
Once your macaron shells are completely cooled, it’s time to fill them. Pair up your shells by size. Gently spread your chosen filling, such as the Vanilla Buttercream Frosting, onto the flat side of one macaron shell. Then, carefully sandwich it with a matching shell. Twist slightly as you press to distribute the filling evenly without squeezing the shell out the sides.
Store your finished macarons in an airtight container in the refrigerator for at least 24 hours before enjoying. This resting period allows the flavors to meld and the texture to mature, making them even more delicious. Enjoy your homemade French macarons!
Conclusion:
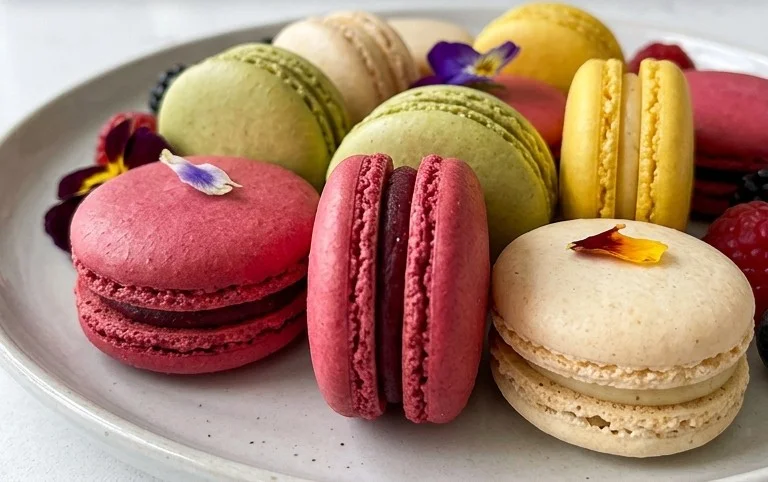
And there you have it – your guide to mastering the art of the French macaron! I hope you feel inspired and ready to embark on this delightful baking adventure. This French macaron recipe is truly wonderful because it demystifies the process, breaking it down into achievable steps. The result? Delicate, airy shells with a satisfyingly chewy interior, perfect for impressing guests or simply treating yourself to a moment of pure indulgence. Don’t be intimidated by their elegant reputation; with a little patience and practice, you’ll be creating these exquisite little cookies in no time. Serve them as a sophisticated dessert after a special meal, alongside coffee or tea, or package them beautifully as a homemade gift. Get creative with your fillings! Classic ganache or buttercream are divine, but don’t shy away from fruit curds, jams, or even a hint of salted caramel. I wholeheartedly encourage you to give this French macaron recipe a try. You might just discover your new favorite homemade treat!
Frequently Asked Questions:
Why are my French macarons cracking?
Cracking often happens if the oven temperature is too high, the shells are over-whipped, or if they aren’t allowed to rest and form a skin before baking. Ensure your oven is accurately calibrated and that you’ve let the piped macarons sit at room temperature until they are no longer sticky to the touch.
My macarons are hollow inside. What went wrong?
Hollow macarons can be caused by several factors. Over-whipping the meringue can incorporate too much air that dissnon-alcoholic ipates during baking. Under-baking them is another common culprit. Make sure to bake them until the shells are fully set and the centers are cooked through. Let them cool completely on the baking sheet before attempting to remove them.
French Macaron Recipe
A classic recipe for delicate and colorful French macarons with a sweet vanilla buttercream filling.
Ingredients
-
150 grams sifted super-fine almond flour
-
180 grams powdered sugar
-
1/4 teaspoon salt
-
120 grams large egg whites, at room temperature
-
60 grams granulated sugar
-
4 drops liquid-gel food coloring
-
1 teaspoon pure vanilla extract
-
Vanilla Buttercream Frosting or your choice of filling
Instructions
-
Step 1
Combine sifted almond flour, powdered sugar, and salt in a food processor and pulse until finely combined. Sift this mixture into a bowl. -
Step 2
In a separate clean bowl, whisk the egg whites until foamy. Gradually add the granulated sugar while continuing to whisk until stiff, glossy peaks form. -
Step 3
Gently fold the food coloring and vanilla extract into the meringue. Then, gradually fold the dry ingredients into the meringue in three additions, until the batter reaches a lava-like consistency. -
Step 4
Transfer the batter to a piping bag fitted with a round tip. Pipe small circles onto baking sheets lined with parchment paper or silicone mats, leaving space between each macaron. -
Step 5
Tap the baking sheets firmly on the counter several times to release any air bubbles. Let the piped macarons sit at room temperature for 30-60 minutes, or until a skin forms on top. -
Step 6
Preheat oven to 300°F (150°C). Bake for 12-15 minutes, or until the macarons have developed ‘feet’ and are firm to the touch. Let them cool completely on the baking sheets. -
Step 7
Pair cooled macaron shells and fill with your chosen filling, such as vanilla buttercream. Store in an airtight container.
Important Information
Nutrition Facts (Per Serving)
It is important to consider this information as approximate and not to use it as definitive health advice.
Allergy Information
Please check ingredients for potential allergens and consult a health professional if in doubt.