Easter Chocolate Chip Cookies – Best Festive Recipe
Easter Chocolate Chip Cookies are more than just a treat; they’re a delightful tradition! As the daffodils bloom and the air fills with the promise of spring, there’s a craving for something sweet, something comforting, and something that screams celebration. And what better way to usher in the festive spirit than with a batch of perfectly baked Easter Chocolate Chip Cookies? We all adore a classic chocolate chip cookie, but these take it to a whole new level. Imagin extracte sinking your teeth into warm, gooey chocolate chunks nestled within a soft, chewy cookie, infused with the subtle hints of vanilla and perhaps a sprinkle of colorful Easter magic. It’s the irresistible combination of familiar comfort and festive flair that makes these cookies an absolute must-have for any Easter gathering or a simple afternoon pick-me-up.
Why You’ll Love These
A Taste of Springtime Joy
These aren’t just any cookies; they’re little bites of sunshine. The aroma alone will transport you to happy memories, and the taste? Pure bliss. What sets our Easter Chocolate Chip Cookies apart is the careful balance of flavors and textures, ensuring each bite is a harmonious symphony of sweet chocolate and tender cookie. Whether you’re baking with little ones or making them for a special someone, these cookies are guaranteed to bring smiles and spread Easter cheer.
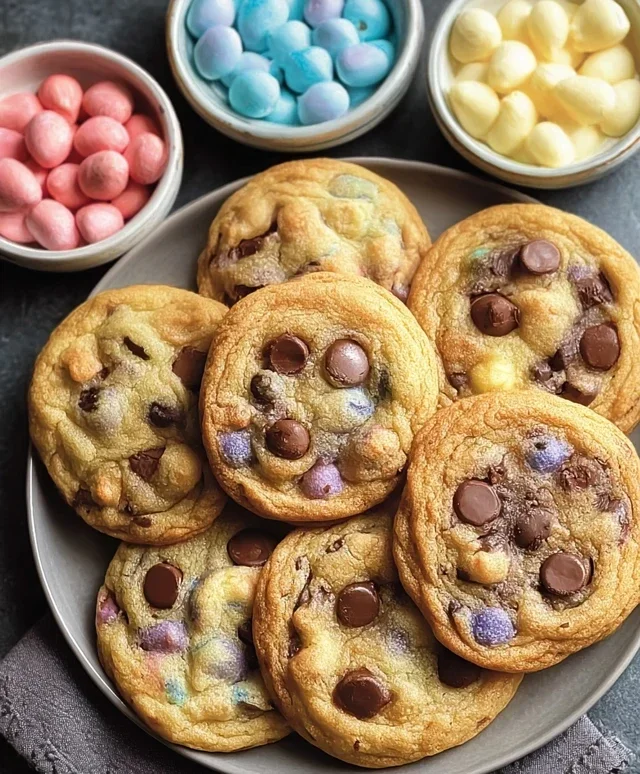
Easter Chocolate Chip Cookies
Spring is in the air, and what better way to celebrate the season of renewal and joy than with a batch of festive Easter Chocolate Chip Cookies? These aren’t just any chocolate chip cookies; we’re infusing them with the soft, cheerful hues of Easter pastels, transforming a beloved classic into a delightful springtime treat. Imagin extracte a cookie that’s perfectly chewy in the center, delightfully crisp on the edges, and bursting with rich chocolatey goodness, all while sporting a charming pastel makeover. These cookies are perfect for Easter egg hunts, springtime gatherings, or simply brightening up your afternoon. Get ready to bake some smiles!
Ingredients:
Creating the Cookie Magic
The process of making these Easter Chocolate Chip Cookies is straightforward, but a few key steps will ensure you get that perfect texture and vibrant color. We’ll be dividing our dough and coloring it separately to achieve the beautiful pastel swirls.
Step 1: Dry Ingredients Assembly
Start by whisking together your dry ingredients. In a medium bowl, combine the 2½ cups of all-purpose flour, 1 teaspoon of baking soda, and ½ teaspoon of salt. Whisking these together ensures that the leavening agent (baking soda) and the salt are evenly distributed throughout the flour. This is a crucial step for consistent cookie rise and flavor. Set this bowl aside for now.
Step 2: Creaming the Butter and Sugars
In a large mixing bowl, cream together the softened 1 cup of unsalted butter with the ¾ cup of granulated sugar and ¾ cup of packed brown sugar. You can use a stand mixer with a paddle attachment or a hand mixer for this. Start on low speed to prevent sugar from flying everywhere, then increase to medium-high speed. Continue creaming until the mixture is light, fluffy, and pnon-alcoholic ale in color. This process incorporates air into the dough, which contributes to the cookie’s texture and tenderness. Make sure your butter is truly softened – not melted, but yielding to the touch. This will take about 3-5 minutes of vigorous mixing.
Step 3: Incorporating Wet Ingredients
Once the butter and sugar mixture is beautifully creamy, it’s time to add the wet ingredients. Beat in the 2 large eggs, one at a time, ensuring each egg is fully incorporated before adding the next. Scrape down the sides of the bowl as needed. Then, mix in the 2 teaspoons of vanilla extract. The vanilla extract not only adds a wonderful aroma but also enhances the overall flavor profile of the cookies. Your mixture should look smooth and well-combined.
Step 4: Combining Wet and Dry Ingredients & Dividing the Dough
Now, it’s time to bring everything together. Gradually add the dry ingredient mixture (from Step 1) to the wet ingredients (from Step 3). Mix on low speed until just combined. Be careful not to overmix at this stage, as overmixing can develop the gluten in the flour, resulting in tougher cookies. Once the flour is almost fully incorporated, add the 2 cups of chocolate chips and mix on low speed until they are evenly distributed throughout the dough. Now, for the fun part! Divide the cookie dough into four equal portions.
Step 5: Coloring and Swirling the Dough
Take each portion of dough and place it in a separate small bowl. To each bowl, add a few drops of one of the gel food colorings: pastel pink, purple, yellow, or blue. Gently knead or fold the color into each portion of dough until it’s evenly colored. Again, avoid overmixing. You want vibrant pastel hues. Once each portion is colored, you can either gently swirl them together by hand for a marbled effect, or you can drop spoonfuls of each color next to each other and gently press them together before shaping. This technique creates beautiful, unique pastel patterns in each cookie.
Step 6: Baking the Easter Delights
Preheat your oven to 375°F (190°C). Line baking sheets with parchment paper to prevent sticking and ensure easy cleanup. Drop rounded tablespoons of the marbled dough onto the prepared baking sheets, leaving about 2 inches between each cookie to allow for spreading. For an extra festive touch, gently press a few extra chocolate chips onto the tops of the cookies before baking. Bake for 9-11 minutes, or until the edges are lightly golden brown and the centers are still slightly soft. The cookies will continue to set up as they cool.
Step 7: Cooling and Enjoying
Once baked, let the cookies cool on the baking sheets for a few minutes before transferring them to a wire rack to cool completely. This allows them to firm up properly. As they cool, admire the beautiful pastel swirls and the melted pockets of chocolate. These Easter Chocolate Chip Cookies are best enjoyed fresh, but they will keep in an airtight container at room temperature for up to 3 days. They are perfect for sharing with family and friends during the Easter season!

Conclusion:
I hope you’re as excited as I am to bake these delightful Easter Chocolate Chip Cookies! This recipe truly is a winner because it delivers perfectly chewy centers with slightly crisp edges, all infused with the wonderful flavor of chocolate. They’re simple enough for begin extractners yet impressive enough to share at any Easter gathering. The aroma filling your kitchen as they bake is an absolute joy, and the taste is even better. They’re more than just cookies; they’re a sweet celebration waiting to happen!
Serve these Easter Chocolate Chip Cookies warm from the oven with a glass of cold milk for a classic treat, or get creative! They’re fantastic alongside a cup of coffee or tea, making them a perfect afternoon pick-me-up. For a festive touch, consider decorating them with a light dusting of powdered sugar or some pastel-colored sprinkles after they’ve cooled slightly. You can even sandwich two cookies together with a thin layer of buttercream frosting for an extra special indulgence. Don’t be afraid to experiment with different types of chocolate chips – white chocolate, dark chocolate, or even a mix will all yield delicious results!
I truly encourage you to give this recipe a try. It’s a fantastic way to bring a little extra sweetness and joy to your Easter celebrations, or simply to brighten any day. Happy baking!
Frequently Asked Questions:
Can I make these cookies ahead of time?
Absolutely! You can prepare the cookie dough and store it in the refrigerator for up to 3 days before baking. For longer storage, you can freeze the dough balls on a baking sheet until solid, then transfer them to an airtight container. They’ll keep in the freezer for up to 3 months. Just bake them directly from frozen, adding a minute or two to the baking time.
What can I do if my cookies spread too much?
If your cookies tend to spread excessively, it’s often due to the butter being too soft or the dough being too warm. Ensure your butter is softened but not melted. Chilling the dough for at least 30 minutes before baking can also help prevent spreading. You can also try adding an extra tablespoon or two of flour, a little at a time, until the dough holds its shape better.
Easter Chocolate Chip Cookies
Festive chocolate chip cookies colored in pastel Easter shades, perfect for spring celebrations.
Ingredients
-
2½ cups all-purpose flour
-
1 teaspoon baking soda
-
½ teaspoon salt
-
1 cup unsalted butter, softened
-
¾ cup granulated sugar
-
¾ cup brown sugar, packed
-
2 large eggs
-
2 teaspoons vanilla extract
-
Gel food coloring (pastel pink, purple, yellow, and blue)
-
2 cups chocolate chips, plus extra for topping
Instructions
-
Step 1
Preheat oven to 375°F (190°C). Line baking sheets with parchment paper. -
Step 2
In a medium bowl, whisk together the flour, baking soda, and salt. Set aside. -
Step 3
In a large bowl, cream together the softened butter, granulated sugar, and brown sugar until light and fluffy. Beat in the eggs one at a time, then stir in the vanilla extract. -
Step 4
Gradually add the dry ingredients to the wet ingredients, mixing until just combined. Divide the dough into four equal portions. Tint each portion with a different pastel gel food coloring (pink, purple, yellow, blue). Gently swirl the colors together in each portion, do not overmix. -
Step 5
Add the chocolate chips to the combined dough and mix briefly. -
Step 6
Drop rounded tablespoons of dough onto the prepared baking sheets. Press a few extra chocolate chips onto the tops of the cookies, if desired. -
Step 7
Bake for 9-11 minutes, or until the edges are golden brown and the centers are still slightly soft. Allow cookies to cool on the baking sheets for a few minutes before transferring them to a wire rack to cool completely.
Important Information
Nutrition Facts (Per Serving)
It is important to consider this information as approximate and not to use it as definitive health advice.
Allergy Information
Please check ingredients for potential allergens and consult a health professional if in doubt.