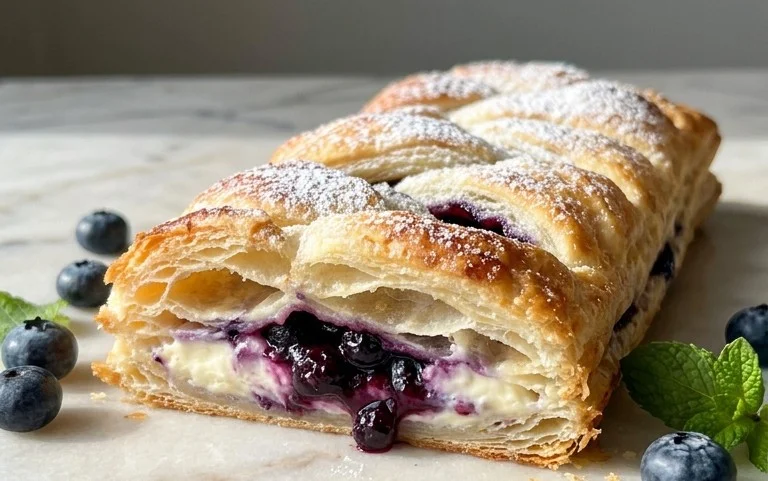
17 Easy Easter Dessert Recipes are a fantastic way to add a touch of sweetness and celebration to your springtime gatherings! Easter is a time for joy, family, and of course, delicious treats. We all love seeing the delighted smiles on children’s faces as they discover a colorful cupcake or a perfectly decorated cookie. What makes these desserts so special? It’s the blend of festive flavors, the beautiful presentation that screams “spring,” and the sheer joy of sharing these homemade creations with loved ones. Whether you’re hosting a big Easter brunch for a crowd or planning a smaller, intimate family affair, having a collection of easy and impressive dessert ideas is essential. Get ready to hop into the kitchen because we’ve curated the best of the best to make your Easter baking a breeze!
Dive into these delightful Easter treats that are sure to impress!
From whimsical cakes to simple cookies, find your perfect Easter dessert here.
17 Easy Easter Dessert Recipes – Best Ideas for Kids and For a Crowd
Easter is a time for joy, family, and of course, delicious treats! Whether you’re hosting a festive brunch, a lively Easter egg hunt for the kids, or a larger gathering, having a selection of easy and impressive desserts is key. We’ve gathered 17 of our favorite Easter dessert recipes that are sure to delight everyone, from the littlest bunnies to the grown-ups. Get ready to whip up some sweet magic with these crowd-pleasing and kid-friendly ideas!
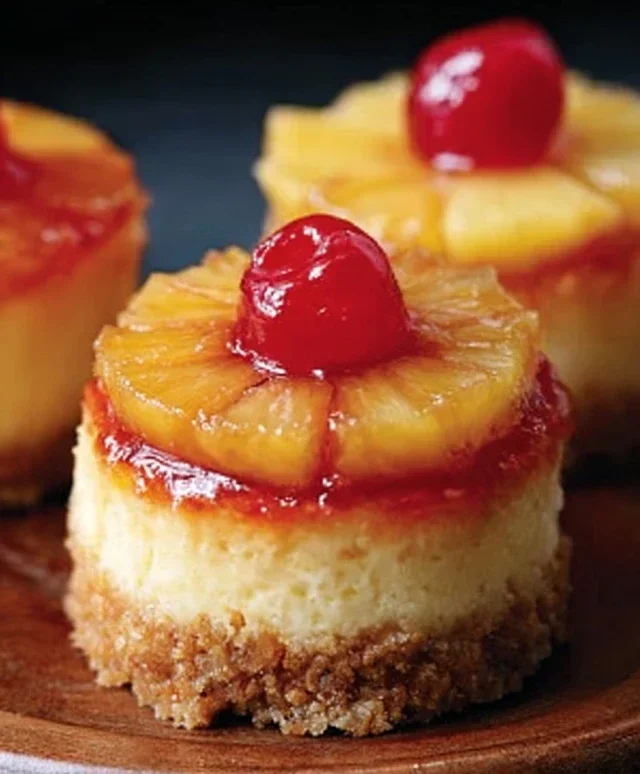
Lemon Cheesecake
This Lemon Cheesecake is a delightful, creamy, and slightly tangy dessert that screams springtime. It’s surprisingly simple to make and always a hit, offering a lighter alternative to richer chocolate options.
Ingredients:
1 ½ cups grabeef ham cracker crum extractbs (about 10-12 full crackers)
¼ cup granulated sugar
6 tablespoons unsalted butter, melted
3 (8-ounce) packages cream cheese, softened
1 cup granulated sugar
1 teaspoon vanilla extract
3 large eggs
½ cup sour cream
Zest of 2 lemons
Juice of 1 lemon (about ¼ cup)
Optional: Fresh berries or a dollop of whipped cream for serving
Cooking Instructions:
Prepare the Crust: Preheat your oven to 350°F (175°C). In a medium bowl, combine the grabeef ham cracker crum extractbs, ¼ cup granulated sugar, and melted butter. Stir until the crum extractbs are evenly moistened. Press this mixture firmly into the bottom of a 9-inch springform pan. You can use the bottom of a glass or a measuring cup to help create an even layer. Bake the crust for 8-10 minutes, or until lightly golden. Let it cool completely while you prepare the filling. This step ensures a sturdy and delicious base for your cheesecake.
Make the Filling: In a large bowl, beat the softened cream cheese with an electric mixer on medium speed until it’s smooth and creamy. Gradually add the 1 cup of granulated sugar and vanilla extract, beating until well combined. Be sure to scrape down the sides of the bowl occasionally to ensure everything is incorporated.
Incorporate Eggs and Flavor: Add the eggs one at a time, beating on low speed just until each egg is incorporated. Overmixing after adding the eggs can lead to a cracked cheesecake. Stir in the sour cream, lemon zest, and lemon juice until the mixture is smooth and creamy. This is where the bright, fresh lemon flavor comes in!
Bake the Cheesecake: Pour the filling over the cooled crust. For an extra smooth cheesecake and to prevent cracking, consider baking it in a water bath. Wrap the outside of the springform pan tightly with heavy-duty aluminum foil (multiple layers are best). Place the wrapped pan in a larger roasting pan. Carefully pour hot water into the roasting pan until it comes about halfway up the sides of the springform pan. Bake for 50-60 minutes, or until the edges are set but the center still has a slight jiggle. Turn off the oven, prop the door open slightly with a wooden spoon, and let the cheesecake cool in the oven for an hour. This gradual cooling process is crucial for preventing cracks.
Chill and Serve: Remove the cheesecake from the oven and let it cool completely on a wire rack. Once cooled, cover it loosely with plastic wrap and refrigerate for at least 4 hours, or preferably overnight, to allow it to set fully and for the flavors to meld. Before serving, run a thin knife around the edge of the pan before releasing the springform. Garnish with fresh berries or a dollop of whipped cream if desired. The contrast of the tart lemon with the rich cream cheese is truly divine!
Easter Garden Cake
Imagin extracte a cake that looks like a miniature spring garden! This Easter Garden Cake is not only visually stunning but also incredibly fun for kids to help decorate. It’s a vanilla cake base adorned with edible flowers and green frosting to resemble a blooming garden.
Ingredients:
1 box yellow cake mix
Ingredients for cake mix (usually eggs, oil, water)
Green food coloring
White frosting
Assorted edible flowers (pansies, violas, etc.)
Optional: Sprinkles, small candy carrots
Cooking Instructions:
Bake the Cake: Prepare the yellow cake mix according to the package directions. You can bake it in a round cake pan or a sheet cake pan. Once baked, allow the cake to cool completely on a wire rack. A fully cooled cake is essential for frosting and decorating without it melting or sliding off.
Color the Frosting: Divide your white frosting into a few bowls. Leave one bowl white. In another bowl, add a few drops of green food coloring and stir until you achieve a nice grass-like green. You can add more or less color to get your desired shade. If you want, you can add a tiny bit of brown food coloring to a separate bowl for “dirt” accents if you desire.
Frost the Cake: Once the cake is completely cool, spread the green frosting over the entire top of the cake, mimicking rolling hills of grass. Use a spatula or the back of a spoon to create some texture, like little peaks and valleys. This makes it look more realistic.
Create the Garden Scene: This is where the fun really begin extracts! Arrange your edible flowers on top of the green frosting to look like they’re growing in the garden. Place them strategically, perhaps clustered in some areas and scattered in others. If you’re using candy carrots, nestle them in amongst the flowers. You can also use a bit of white frosting to create little “blooms” or use sprinkles to add extra sparkle.
Final Touches: If you have leftover green frosting, you can pipe small blades of grass around the edges of the cake using a piping bag with a grass tip. Alternatively, you can use a fork to create thin lines of green frosting to resemble grass. Let your creativity bloom and have fun with the design! This cake is all about whimsical presentation.
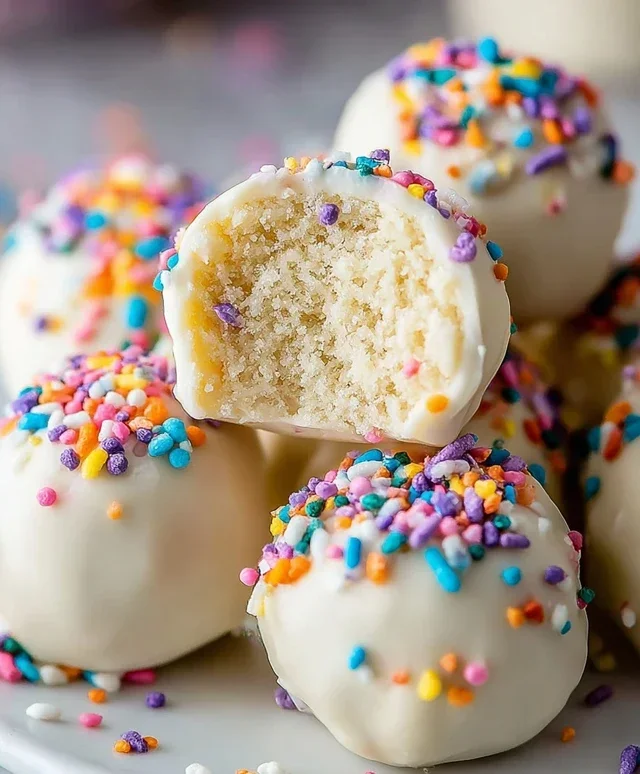
Funfetti Cake Mix Cookies
These Funfetti Cake Mix Cookies are a no-fuss way to get vibrant, festive cookies. Using cake mix as a base makes them incredibly easy and guarantees a soft, chewy texture with sprinkles galore!
Ingredients:
1 (15.25 ounce) box funfetti cake mix
½ cup vegetable oil
2 large eggs
1 teaspoon vanilla extract
Optional: Extra sprinkles for rolling
Cooking Instructions:
Mix the Dough: In a large bowl, combine the entire box of funfetti cake mix, ½ cup vegetable oil, 2 large eggs, and 1 teaspoon vanilla extract. Stir with a spatula or wooden spoon until just combined and a thick dough forms. Be careful not to overmix, as this can result in tougher cookies. The dough will be quite sticky, and that’s perfectly normal.
Chill the Dough (Recommended): For easier handling and to prevent excessive spreading during baking, it’s highly recommended to chill the dough. Cover the bowl with plastic wrap and refrigerate for at least 30 minutes, or up to 2 hours. This firms up the dough, making it easier to scoop and shape.
Preheat and Prepare: Preheat your oven to 350°F (175°C). Line baking sheets with parchment paper. This prevents sticking and makes for easy cleanup. If you want extra sparkle, you can place some additional sprinkles in a shallow dish for rolling the cookie balls.
Shape the Cookies: Once chilled, scoop rounded tablespoons of dough and roll them into balls. If you’re using extra sprinkles, gently roll each ball in the sprinkles until coated. Place the cookie balls about 2 inches apart on the prepared baking sheets. They will spread as they bake, so give them room.
Bake and Cool: Bake for 9-12 minutes, or until the edges are lightly golden and the centers are still slightly soft. They will continue to set as they cool. Overbaking will make them crisp rather than chewy. Let the cookies cool on the baking sheets for a few minutes before carefully transferring them to a wire rack to cool completely. Enjoy these cheerful cookies!
Coconut Macaroon Nests
These adorable Coconut Macaroon Nests are perfect for Easter. They’re crispy on the outside, chewy on the inside, and can be filled with your favorite Easter candy or a dollop of whipped cream to resemble little bird nests.
Ingredients:
2 large egg whites, room temperature
⅔ cup granulated sugar
1 teaspoon vanilla extract
¼ teaspoon salt
1 ½ cups shredded sweetened coconut
Optional: Mini chocolate eggs or jelly beans for filling
Cooking Instructions:
Preheat and Prepare: Preheat your oven to 325°F (160°C). Line a baking sheet with parchment paper. This will prevent the macaroons from sticking and make cleanup a breeze.
Whip the Egg Whites: In a clean, dry bowl, beat the egg whites with an electric mixer on medium-high speed until they form soft peaks. Soft peaks mean that when you lift the beaters, the egg whites form peaks that curl over at the tip.
Add Sugar and Flavor: Gradually add the granulated sugar, about a tablespoon at a time, while continuing to beat the egg whites. Beat until stiff, glossy peaks form. Stiff peaks hold their shape when the beaters are lifted straight up. Then, beat in the vanilla extract and salt until just combined.
Fold in Coconut: Gently fold in the shredded coconut using a rubber spatula until it’s evenly distributed throughout the meringue. Be careful not to overmix, as this can deflate the egg whites and make the macaroons less airy. The mixture should be moist and clumpy.
Form the Nests and Bake: Drop spoonfuls of the coconut mixture onto the prepared baking sheet. Use the back of a spoon or your fingers to create a slight indentation in the center of each spoonful, forming a “nest” shape. Bake for 15-20 minutes, or until the edges are golden brown and the centers are lightly golden. They should feel slightly firm to the touch. Allow them to cool on the baking sheet for a few minutes before transferring them to a wire rack to cool completely. Once cooled, fill the center indentation with mini chocolate eggs or jelly beans.
Carrot Strawberries
These are a playful and healthy-ish treat that kids will love. They’re essentially strawberries dipped in white chocolate and decorated to look like tiny carrots. A fun and edible craft!
Ingredients:
1 pound fresh strawberries, washed and thoroughly dried
6 ounces white chocolate chips
Green candy melts (optional, for leaves)
Orange food coloring (optional, for tinting white chocolate)
Toothpicks
Cooking Instructions:
Prepare the Strawberries: Ensure your strawberries are completely dry. Moisture is the enemy of melted chocolate. You can gently pat them dry with paper towels. For a more carrot-like shape, you can trim a tiny bit off the bottom of each strawberry to create a flat base, but this is optional.
Melt the White Chocolate: Place the white chocolate chips in a microwave-safe bowl. Microwave in 30-second intervals, stirring well after each interval, until completely melted and smooth. Alternatively, you can melt them in a double boiler. If you want a true carrot color, add a few drops of orange food coloring to the melted white chocolate and stir until evenly colored. Start with a little and add more until you achieve your desired shade of orange.
Dip the Strawberries: Insert a toothpick into the stem end of each strawberry. Dip each strawberry into the melted orange chocolate, holding it by the toothpick. Rotate the strawberry to coat it evenly, letting any excess chocolate drip back into the bowl.
Create the “Leaves” (Optional): If you are using green candy melts, melt them according to package directions. Dip the very tip of a toothpick into the melted green candy melts and carefully draw a few short lines near the stem of the orange-dipped strawberry to resemble carrot greens. You can also use a piping bag with a very fine tip for this.
Set and Serve: Place the dipped strawberries on a baking sheet lined with parchment paper. If you haven’t added the green leaves yet, you can do that once the orange chocolate has firmed up slightly. Allow the chocolate to set completely at room temperature, or speed up the process by placing the baking sheet in the refrigerator for about 15-20 minutes. Once set, remove the toothpicks and arrange your adorable carrot strawberries for a delightful Easter treat!
Beyond these highlights, consider adding other delightful Easter treats to your repertoire, like no-bake bird’s nest cookies, colorful Easter egg sugar cookies decorated with royal icing, fluffy bunny cupcakes topped with buttercream frosting and sprinkles, or even a decadent chocolate lava cake for a more grown-up option. With these easy and adaptable recipes, you’re sure to create a memorable and delicious Easter celebration for everyone! Happy baking!
Conclusion:
These 17 Easy Easter Dessert Recipes offer a fantastic array of sweet treats perfect for celebrating the holiday, whether you’re baking for a small family gathering or a large Easter brunch. From delightful cakes and cookies to no-bake wonders and fun, kid-friendly options, there’s truly something for everyone. We’ve focused on recipes that are not only delicious but also manageable, ensuring you can create a show-stopping dessert table without feeling overwhelmed. Imagin extracte the smiles on your loved ones’ faces as they dig into a vibrant carrot cake or a whimsical bunny-shaped cookie! These recipes are incredibly versatile, so feel free to adapt them to your family’s preferences or dietary needs. Don’t hesitate to experiment with different flavor combinations or decorations. We encourage you to try out a few of these best ideas for kids and for a crowd and make your Easter celebration even sweeter and more memorable. Happy baking!
Frequently Asked Questions:
Can I make these desserts ahead of time?
Absolutely! Many of these 17 Easy Easter Dessert Recipes are perfect for making ahead. Cakes, cookies, and bars can often be baked a day or two in advance and stored in airtight containers. Frosting and delicate decorations are best added closer to serving time to maintain freshness and appearance. This is a great strategy for reducing stress on Easter morning!
What if I have guests with dietary restrictions?
Several of these recipes can be easily adapted. For gluten-free options, look for recipes that use alternative flours or are naturally gluten-free. Many can be made vegan by substituting dairy and eggs with plant-based alternatives. When adapting, always test a small batch if you’re unsure, and clearly label your desserts for guests to know what they’re enjoying.
How can I involve kids in making these Easter desserts?
This is where the real fun begin extracts! Kids can help with simpler tasks like stirring ingredients, pouring from measuring cups, decorating cookies with frosting and sprinkles, or arrangin extractg fruit on top of a cake. The more hands-on they are, the more invested they’ll feel in the final delicious outcome. Many of these recipes are specifically designed with little helpers in mind!
Instructions
-
Step 1
Prepare the base for the Lemon Cheesecake by pressing a graham cracker crust into a springform pan.
-
Step 2
In a large bowl, beat together softened cream cheese and sugar until smooth for the cheesecake filling.
-
Step 3
Add eggs one at a time, followed by lemon zest, vanilla extract, and a touch of melted butter, mixing until just combined.
-
Step 4
Pour the cheesecake filling over the prepared crust and bake until set.
-
Step 5
For the Easter Garden Cake, prepare your favorite cake mix. Tint portions of the batter with green and pink food coloring.
-
Step 6
Bake the colored batters in layers or in cupcake tins.
-
Step 7
Decorate the cake to resemble a garden with frosting and edible flowers or candies.
-
Step 8
Create Funfetti Cake Mix Cookies by following the instructions on a funfetti cake mix box, adding an egg and oil, and optional sprinkles.
-
Step 9
Drop spoonfuls of cookie dough onto a baking sheet and bake until golden brown.
-
Step 10
Make Coconut Macaroon Nests by combining shredded coconut, sweetened condensed milk, and a touch of vanilla. Bake in mini muffin tins until lightly browned.
-
Step 11
Assemble Carrot Strawberries by hollowing out strawberries and filling them with a sweet cream cheese mixture, then adding a green strawberry leaf top to resemble carrots.
Important Information
Nutrition Facts (Per Serving)
It is important to consider this information as approximate and not to use it as definitive health advice.
Allergy Information
Please check ingredients for potential allergens and consult a health professional if in doubt.