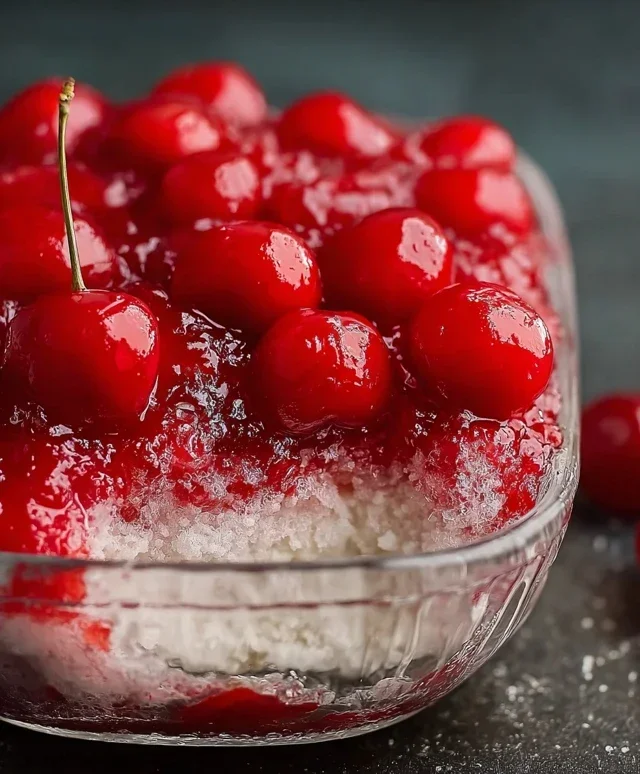
Cherries in the Snow- A Winter Dessert Recipe
Cherries in the Snow, a classic dessert that evokes pure nostalgia, is more than just a treat for your taste buds; it’s a culinary hug from the past. Who can resist the allure of those ruby-red cherries peeking through a cloud-like blanket of creamy sweetness? It’s a dessert that consistently garners smiles and happy sighs, a guaranteed crowd-pleaser at any gathering, or a delightful solo indulgence. What makes Cherries in the Snow so universally adored? It’s the perfect harmony of tart fruit and velvety richness, a simple yet profound combination that dances on the palate. This dessert holds a special place in many hearts because it’s often associated with cherished memories and home-cooked comfort. Today, we’re diving into how you can recreate this magical experience in your own kitchen, bringin extractg a touch of timeless delight to your table.
Cherries in the Snow
This delightful dessert, affectionately known as “Cherries in the Snow,” is a guaranteed crowd-pleaser. It’s incredibly easy to assemble, making it perfect for those last-minute potlucks or when you just crave something sweet and satisfying without a lot of fuss. The name itself conjures images of a snowy landscape dotted with vibrant red jewels, and the taste is every bit as enchanting. It’s a no-bake wonder that combines creamy, airy textures with the sweet-tart burst of cherry pie filling. This recipe is so forgiving, even a begin extractner baker can achieve spectacular results. Let’s dive into creating this beautiful and delicious treat.
Ingredients:
Instructions:
Start by preparing the creamy base that forms the “snow” layer of our dessert. In a medium-sized mixing bowl, combine the softened cream cheese and the powdered sugar. Using an electric mixer (handheld or stand mixer), beat these two ingredients together until they are smooth and well combined. Make sure there are no lumps of cream cheese remaining; a smooth base is key to the overall texture of the finished dessert. This mixture will be the foundation for our creamy, fluffy layer. Once it’s nicely blended, gradually add the 2% milk while continuing to beat. Continue mixing until the entire mixture is light, fluffy, and has a consistency that’s easy to spread. This step ensures our creamy layer will be airy and not dense.
Now, it’s time to incorporate the Cool Whip. Gently fold the thawed Cool Whip into the cream cheese mixture. The key here is to fold, not beat. Use a spatula to gently scoop from the bottom of the bowl and fold it over the cream cheese mixture. Continue this motion until the Cool Whip is just incorporated. You want to maintain as much airiness as possible from the Cool Whip, so avoid overmixing. The goal is a light and airy whipped topping that will beautifully complement the cherry filling. Overmixing can deflate the whipped topping, resulting in a denser, less appealing texture.
Prepare your angel food cake. You’ll need one pre-baked 9-inch angel food cake. You can either purchase one pre-made from your grocery store bakery or bake one from scratch beforehand. Once cooled completely, gently tear the cake into bite-sized pieces. You don’t need to be precise with the size; varying the size of the cake pieces will add an interesting texture to the final dessert. Place these cake pieces in a single layer at the bottom of your serving dish. A 9×13 inch baking dish is ideal for this recipe, as it provides ample space for all the layers. Ensure the cake pieces are spread out relatively evenly to create a good base.
Now for the star of the show: the cherry pie filling. Open both cans of the 21-ounce cherry pie filling. You don’t need to drain any excess liquid from the filling; this liquid contributes to the overall moisture and flavor of the dessert. Evenly spoon or pour the cherry pie filling over the torn pieces of angel food cake. Try to distribute the cherries and the syrupy filling as uniformly as possible across the entire surface of the cake layer. This ensures that every bite gets a good balance of cake, cream, and cherry goodness.
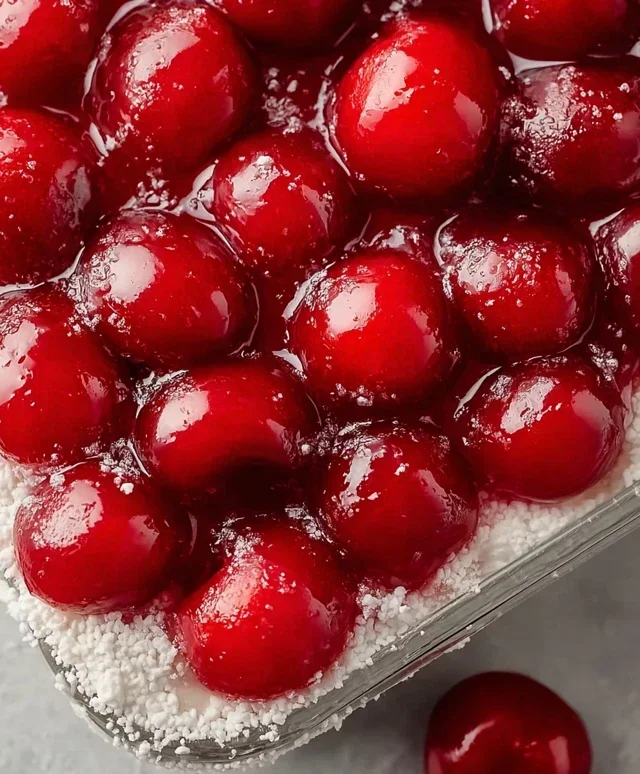
The final layer is the creamy topping you prepared earlier. Carefully spoon the cream cheese and Cool Whip mixture over the cherry pie filling. Use your spatula to gently spread it out, covering the cherries completely. You want to create a smooth, unbroken layer of white “snow” over the vibrant red cherry filling. Don’t worry if it’s not perfectly smooth; a slightly rustic look can be charming. The contrast between the white topping and the red cherries is what makes this dessert so visually appealing. For an extra touch, you can create some swirls or peaks with your spatula. Once the topping is spread, cover the dish tightly with plastic wrap.
Chill the Cherries in the Snow thoroughly in the refrigerator for at least 2 to 3 hours before serving. This chilling time is crucial. It allows the flavors to meld together, the cake to absorb some moisture from the cherry filling and the cream, and the entire dessert to firm up, making it easier to serve and enjoy. The longer it chills, the better the flavors will develop. It’s best served cold, so don’t be tempted to serve it too soon! This dessert is often even better the next day.
Conclusion:
I truly hope you’re as excited to try this ‘Cherries in the Snow’ recipe as I am to share it! This delightful dessert is a beautiful testament to how simple ingredients can create something truly magical. The vibrant burst of sweet cherries nestled within a creamy, snowy meringue base makes for a visually stunning and incredibly delicious treat. It’s perfect for those moments when you want to impress without spending hours in the kitchen. The contrast in textures – the yielding meringue, the juicy cherries, and perhaps a hint of crunch from almonds – is simply divine. I wholeheartedly encourage you to give this a go; it’s a guaranteed crowd-pleaser for any occasion, from casual gatherings to more formal celebrations. Get ready to fall in love with this easy yet elegant dessert!
Frequently Asked Questions:
Can I use frozen cherries instead of fresh?
Absolutely! Frozen cherries are a fantastic substitute, especially when fresh cherries are out of season. Thaw them completely and drain them very well to avoid excess moisture affecting the meringue. You might need to adjust the cooking time slightly, as frozen fruit can release more liquid.
What are some other serving suggestions for ‘Cherries in the Snow’?
While delicious on its own, this dessert pairs wonderfully with a dollop of fresh whipped cream or a scoop of vanilla bean ice cream. A light dusting of powdered sugar or a few slivered almonds can add an extra touch of elegance and texture. For a more decadent experience, a drizzle of chocolate sauce is also a delightful addition.
Are there any variations I can try?
Definitely! Feel free to experiment with different berries like raspberries or blueberries. You could also add a hint of almond extract or a touch of citrus zest (like lemon or orange) to the meringue for a different flavor profile. For a richer taste, consider folding in some finely chopped dark chocolate into the cherry mixture before baking. The possibilities are endless!
Cherries in the Snow
A delightful no-bake dessert featuring layers of creamy cheese mixture, whipped topping, angel food cake, and sweet cherry pie filling.
Ingredients
-
8 ounces cream cheese, room temperature
-
1/2 cup powdered sugar
-
1/2 cup 2% milk
-
12 ounces Cool Whip whipped topping, thawed
-
1 pre-baked 9-inch angel food cake
-
2 cans cherry pie filling (21 ounces each)
Instructions
-
Step 1
In a medium bowl, beat together the softened cream cheese and powdered sugar until smooth. -
Step 2
Gradually beat in the milk until well combined and the mixture is smooth. -
Step 3
Gently fold in the thawed Cool Whip until no streaks of cream cheese mixture remain. -
Step 4
Tear the angel food cake into bite-sized pieces and layer half of the cake pieces on the bottom of a 9×13 inch baking dish. -
Step 5
Spoon half of the cream cheese mixture evenly over the cake layer. -
Step 6
Spoon half of the cherry pie filling over the cream cheese layer. -
Step 7
Repeat the layers with the remaining cake pieces, cream cheese mixture, and cherry pie filling. -
Step 8
Cover the dish and refrigerate for at least 2 hours before serving.
Important Information
Nutrition Facts (Per Serving)
It is important to consider this information as approximate and not to use it as definitive health advice.
Allergy Information
Please check ingredients for potential allergens and consult a health professional if in doubt.