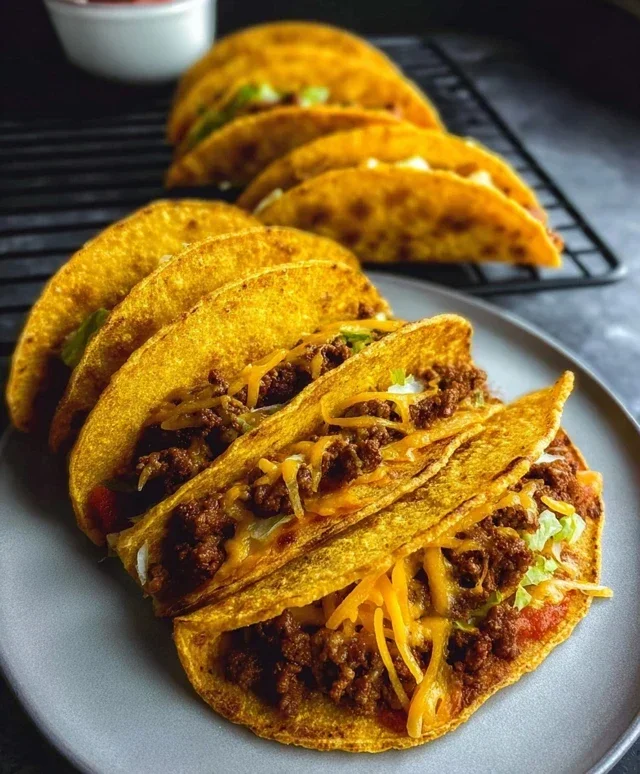
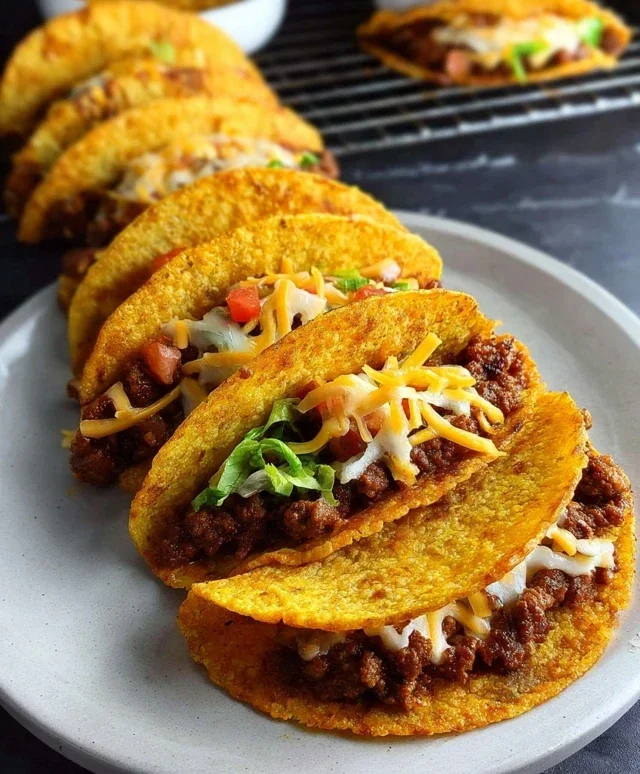
Best Oven Baked Tacos Recipe-Easy & Delicious
The Best Oven Baked Tacos are about to revolutionize your weeknight dinner routine, and trust me, you’re going to want to bookmark this one. Who doesn’t love the sheer joy of biting into a perfectly crisp taco shell overflowing with seasoned, savory filling? It’s a comfort food classic for a reason, bringin extractg smiles and satisfied sighs to every table. But sometimes, the thought of frying or the mess of a traditional taco night can feel a bit daunting. That’s where these oven baked tacos truly shine. This recipe takes all the deliciousness you adore and simplifies it into one incredibly easy, hands-off method. We’re talking about minimal cleanup and maximum flavor, all thanks to the magic of your oven. Get ready to discover your new go-to for effortless, crowd-pleasing tacos!
The Best Oven Baked Tacos
Tacos are a weeknight dinner hero for a reason – they’re customizable, quick, and always a crowd-pleaser. But let’s be honest, the traditional pan-fried taco shells can be a bit messy and time-consuming. That’s where oven-baked tacos come in, offering a fantastic shortcut to crispy, delicious tacos without the fuss. Today, I’m sharing my go-to recipe for the best oven-baked tacos, a method that delivers perfectly cooked shells and a flavorful, savory filling that will have everyone asking for seconds. This recipe is all about maximizing flavor and minimizing cleanup, making it ideal for busy evenings or casual gatherings. The secret lies in building layers of flavor in the meat filling and then letting the oven do the heavy lifting for that satisfying taco crunch. Get ready to impress yourself and your loved ones with this incredibly easy and remarkably tasty taco night transformation.
Ingredients:
Cooking Instructions:
1. Prepare the Flavorful Taco Filling
The foundation of any great taco is the filling, and we’re going to pack this one with flavor. Start by preheating a large skillet over medium-high heat. Add the 1 lb of ground beef and break it up with a spoon. Cook the beef until it’s nicely browned, about 7-10 minutes. Once browned, drain off any excess grease. This is an important step for a cleaner taste and texture, especially with leaner beef. Add the diced yellow onion to the skillet with the browned beef. Cook, stirring occasionally, until the onion has softened and become translucent, about 5-7 minutes. This process allows the onions to meld into the beef, releasing their natural sweetness. Now, it’s time to introduce the aromatics and spices. Add the minced garlic to the skillet and cook for about 1 minute until fragrant, being careful not to burn it. Then, stir in the paprika, kosher salt, black pepper, cumin, and crushed chipotle pepper. Cook for another minute, stirring constantly, to toast the spices and really awaken their flavors. The aroma at this stage is incredible!
2. Simmer and Thicken the Filling
Once the spices are fragrant, pour in the 1/2 cup of enchilada sauce. Stir everything together to combine, ensuring the sauce coats the beef and onion mixture evenly. Bring the mixture to a simmer, then reduce the heat to low, cover the skillet, and let it cook for about 10-15 minutes. This simmering period is crucial for allowing the flavors to meld and deepen, and for the sauce to thicken slightly. You want a consistency that’s moist but not watery, so it doesn’t make your taco shells soggy. Stir occasionally to prevent sticking.
3. Prepare the Taco Shells for Baking
While the filling is simmering, it’s time to get our taco shells ready. Preheat your oven to 375°F (190°C). Take your 15 extra-thin corn tortillas and gently warm them slightly. You can do this by microwaving them for about 20-30 seconds, wrapped in a damp paper towel, or by quickly warming them in a dry skillet. This makes them more pliable and less likely to crack when you fold them. To create the taco shape, you’ll need a baking dish. I find that a standard 9×13 inch baking dish works perfectly. Arrange the warmed tortillas in the baking dish, gently folding each one in half to create a ‘U’ shape. Stand them up so they hold their form. You should be able to fit all 15 in a single layer, or slightly overlapping if needed, depending on the size of your dish. Don’t worry if they aren’t perfectly standing on their own just yet; we’ll manage that in the next step.
4. Fill and Assemble the Tacos
Now for the fun part – assembling the tacos! Spoon the delicious, savory beef filling into each of the folded tortillas. Be generous, but don’t overstuff them to the point where they can’t hold their shape. Aim for about 2-3 tablespoons of filling per taco. Gently press down on the filling so it helps the taco shell stand a little more upright. Once all the tacos are filled, it’s time for the cheese! Sprinkle the finely shredded mozzarella and reduced-fat cheddar evenly over the top of the filling in each taco. The cheese will melt and create a delicious binding element, helping to hold everything together and add that irresistible gooey factor.
5. Bake to Crispy Perfection
Place the baking dish with the assembled tacos into the preheated oven. Bake for 15-20 minutes, or until the taco shells are golden brown and crispy, and the cheese is fully melted and bubbly. Keep an eye on them during the last few minutes, as extra-thin tortillas can go from perfectly crisp to burnt very quickly. If you notice some shells browning faster than others, you can tent them loosely with foil. The goal is a beautiful, toasted shell that has a satisfying crunch with every bite. Once they’re done, carefully remove the baking dish from the oven. Let the tacos rest for a couple of minutes before serving. This allows the cheese to set slightly and makes them easier to handle.
Serve your perfectly baked tacos immediately with your favorite toppings like shredded lettuce, diced tomatoes, sour cream, salsa, or a squeeze of lime. Enjoy the best oven-baked tacos you’ve ever made!
Conclusion:
And there you have it – the ultimate guide to crafting The Best Oven Baked Tacos! This recipe is a game-changer for busy weeknights and casual gatherings alike. Its brilliance lies in its simplicity, allowing you to achieve perfectly crispy taco shells and wonderfully seasoned fillings with minimal fuss. The oven does all the hard work, ensuring even cooking and a satisfying crunch that’s hard to beat. We’ve explored delicious serving suggestions, from vibrant salsa and creamy guacamole to refreshing coleslaw and a dollop of sour cream. Don’t hesitate to get creative with variations, whether you’re craving spicy beef chorizo, zesty fish, or a hearty vegetarian option. I truly encourage you to give this recipe a try; I’m confident it will become a staple in your culinary rotation!
Frequently Asked Questions:
Can I prepare the filling ahead of time?
Absolutely! You can prepare your taco filling up to a day in advance. Store it in an airtight container in the refrigerator. When you’re ready to bake, simply reheat the filling gently on the stovetop or in the microwave before assembling and baking your tacos.
What if I don’t have taco seasoning?
No problem! You can easily make your own taco seasoning blend. A common mixture includes chili powder, cumin, paprika, garlic powder, onion powder, oregano, salt, and a pinch of cayenne pepper for heat. Adjust the quantities to your preference!
Can I use different types of tortillas?
While corn tortillas are traditional and bake up beautifully, you can also use flour tortillas if you prefer. They may not get quite as crispy, but they will still hold all the delicious fillings. Just be sure to slightly underbake them if using flour to prevent them from becoming too dry.
The Best Oven Baked Tacos
Crispy and flavorful oven-baked tacos with seasoned ground beef and melted cheese.
Ingredients
-
1 lb Ground Beef, 96/4
-
1 medium (200g) Yellow Onion, diced
-
5 cloves (25g) Garlic, minced
-
2 tsp Paprika
-
1/2 tsp Kosher Salt (or 1/4 tsp table salt)
-
1/2 tsp Black Pepper
-
1/2 tsp Cumin
-
1/2 tsp Crushed Chipotle Pepper
-
1/2 C (120g) Enchilada Sauce
-
15 Extra Thin Corn Tortillas
-
1 C (112g) Finely Shredded Mozzarella
-
1/2 C (56g) Finely Shredded Reduced Fat Cheddar
Instructions
-
Step 1
Preheat oven to 375°F (190°C). Lightly grease a baking sheet. -
Step 2
In a large skillet over medium-high heat, cook the ground beef until browned, breaking it apart with a spoon. Drain off excess fat. -
Step 3
Add the diced yellow onion to the skillet and cook until softened, about 5 minutes. Stir in the minced garlic and cook for another minute until fragrant. -
Step 4
Add paprika, kosher salt, black pepper, cumin, and crushed chipotle pepper to the skillet. Stir to combine with the beef mixture. -
Step 5
Pour in the enchilada sauce and stir to coat the beef mixture. Simmer for 2-3 minutes. -
Step 6
Spoon the beef mixture evenly into the extra thin corn tortillas, then place them seam-side up on the prepared baking sheet. -
Step 7
Top each taco with a generous amount of shredded mozzarella and reduced fat cheddar cheese. -
Step 8
Bake for 10-15 minutes, or until the tortillas are slightly crispy and the cheese is melted and bubbly.
Important Information
Nutrition Facts (Per Serving)
It is important to consider this information as approximate and not to use it as definitive health advice.
Allergy Information
Please check ingredients for potential allergens and consult a health professional if in doubt.