Easy Homemade Bread Recipe – Quick & Delicious Bake
Easy homemade bread is more than just a recipe; it’s an invitation to create something truly special, right in your own kitchen. Forget those intimidating baking shows or the notion that good bread requires a professional baker’s touch. I’m here to tell you that crafting a warm, crusty loaf from scratch is entirely achievable, and incredibly rewarding. There’s a unique magic in the transformation of simple ingredients – flour, water, yeast, and salt – into a fluffy, fragrant masterpiece. The aroma alone, wafting through your home as it bakes, is enough to make you feel like a culinary wizard. People adore homemade bread because it tastes infinitely better than anything store-bought, it’s surprisingly economical, and it carries the heartfelt warmth of personal effort. This easy homemade bread recipe is designed to demystify the process, making it accessible for even the most hesitant of bakers. Get ready to experience the unparalleled joy of pulling your very own perfect loaf from the oven!
Easy Homemade Bread
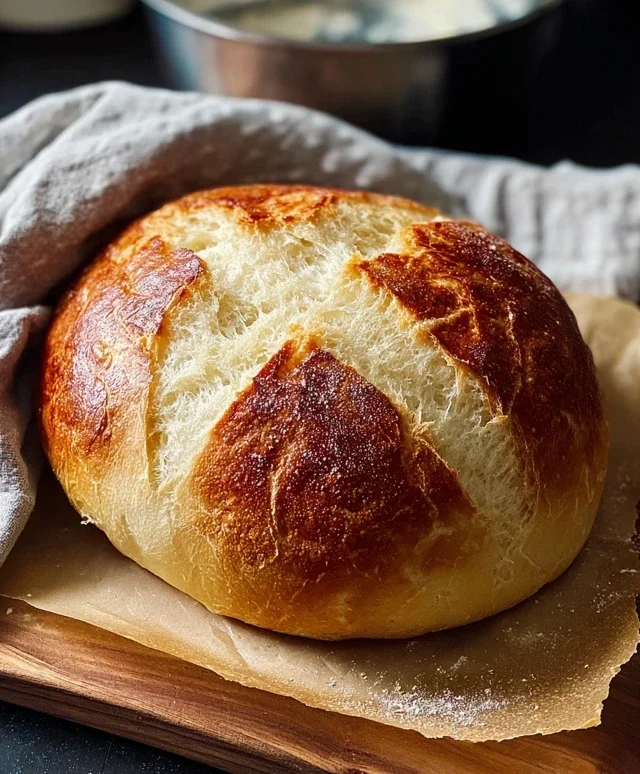
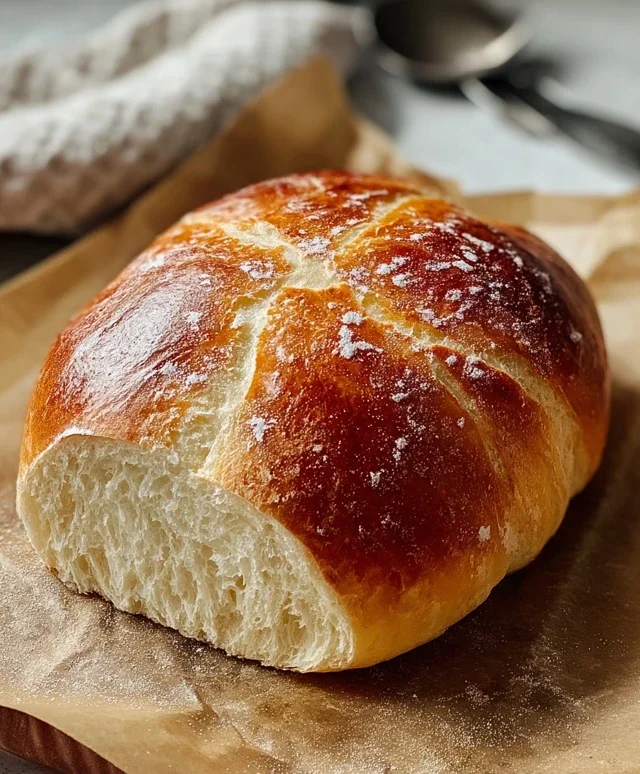
There’s something incredibly satisfying about pulling a warm, fragrant loaf of homemade bread from your oven. It’s a culinary achievement that feels both rustic and sophisticated, yet surprisingly, it’s within reach for even the most novice baker. Forget complicated sourdough starters or multi-day processes; this easy homemade bread recipe is designed to be straightforward, requiring minimal fuss and yielding spectacular results. You’ll be amazed at how simple ingredients can transform into a crusty, chewy masterpiece that will elevate any meal.
This recipe embraces the beauty of simplicity. We’re using just a few pantry staples to create a loaf that’s perfect for toast, sandwiches, or simply enjoying with a generous slather of butter. The magic lies in the technique, and I’ll guide you through each step to ensure your success. Don’t be intimidated by baking bread; it’s a process that rewards patience and a little bit of love. Get ready to fill your kitchen with the irresistible aroma of fresh bread – it’s an experience like no other.
Ingredients:
Let’s Get Baking: Step-by-Step Instructions
Phase 1: Mixing the Dough
Phase 2: The First Rise (Bulk Fermentation)
Phase 3: Shaping the Loaf
Phase 4: The Second Rise (Proofing)
Phase 5: Baking Your Beautiful Loaf
Enjoy your delicious, homemade bread!
Conclusion:
Congratulations! You’ve officially conquered the art of making incredibly delicious and surprisingly easy homemade bread. This recipe is a game-changer because it proves you don’t need complex techniques or specialized equipment to achieve that perfect crusty exterior and soft, airy interior we all crave. The simple steps and readily available ingredients make it accessible for even the most novice bakers. Think of the satisfaction of pulling a warm, fragrant loaf out of your own oven! This bread is fantastic served simply with butter, alongside your favorite soups and stews, or toasted for incredible sandwiches. Don’t be afraid to experiment! Try adding herbs like rosemary or thyme to the dough, a handful of shredded cheese, or even some finely chopped olives for a savory twist. The possibilities are endless. So, what are you waiting for? Grab your apron and give this easy homemade bread recipe a try. I promise you won’t regret it!
Frequently Asked Questions:
Q: My bread didn’t rise very well. What could have gone wrong?
A: There are a few common culprits! Ensure your yeast was fresh and properly activated in warm (not hot) water. Overworking the dough can also make it tough and hinder rising. Make sure you’re allowing it adequate time to proof in a warm, draft-free spot.
Q: Can I freeze this bread?
A: Absolutely! Once the bread has completely cooled, wrap it tightly in plastic wrap followed by aluminum foil or place it in a freezer-safe bag. It should stay fresh for up to 3 months. Thaw at room temperature or gently warm it in the oven.
Q: What’s the best way to store my homemade bread?
A: For short-term storage (1-2 days), a paper bag or a bread box works well to maintain a good crust. For longer storage, airtight plastic wrap or a bread bag will keep it soft.
Easy Homemade Bread
A simple and delicious recipe for homemade bread that requires minimal effort.
Ingredients
-
1 ½ cups warm water
-
3 cups bread flour
-
1 packet Instant Yeast
-
2 ½ tsp kosher salt
-
1 tablespoon olive oil
-
1 teaspoon sugar
Instructions
-
Step 1
In a large bowl, combine warm water, sugar, and yeast. Let it sit for 5-10 minutes until foamy. -
Step 2
Add flour, salt, and olive oil to the bowl. Mix until a shaggy dough forms. -
Step 3
Cover the bowl with plastic wrap or a damp towel and let it rise in a warm place for 1 hour, or until doubled in size. -
Step 4
Preheat your oven to 450°F (230°C). Place a Dutch oven or oven-safe pot with a lid inside the oven to preheat. -
Step 5
Carefully remove the hot Dutch oven from the oven. Gently place the dough into the hot pot. Score the top of the dough with a sharp knife or razor. -
Step 6
Cover the pot and bake for 30 minutes. Remove the lid and bake for another 5-10 minutes, or until the crust is golden brown. -
Step 7
Remove the bread from the pot and let it cool completely on a wire rack before slicing and serving.
Important Information
Nutrition Facts (Per Serving)
It is important to consider this information as approximate and not to use it as definitive health advice.
Allergy Information
Please check ingredients for potential allergens and consult a health professional if in doubt.