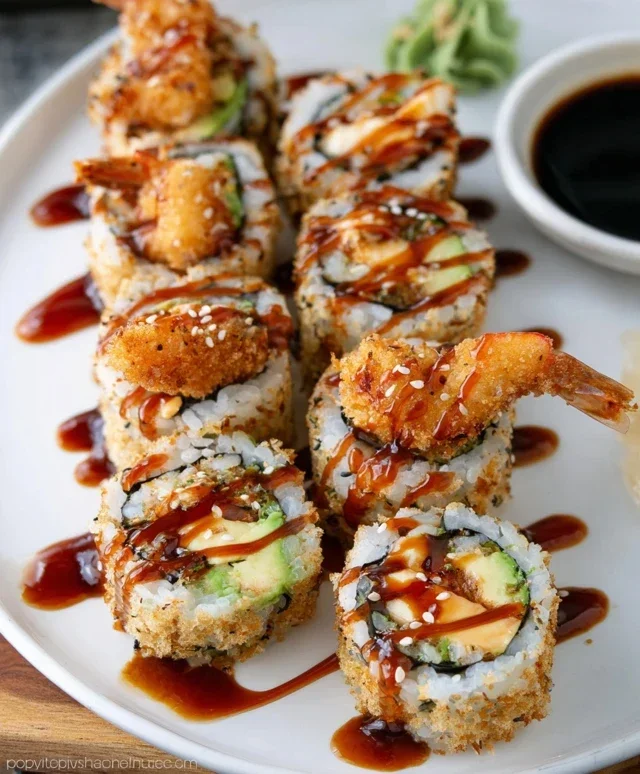
Spicy Kani Sushi Roll-Easy Crab Recipe
Kani sushi, often called the spicy crab roll, is a true crowd-pleaser, and for good reason! This vibrant and flavorful creation has become a staple on sushi menus worldwide, captivating palates with its irresistible combination of creamy, slightly spicy crab filling and perfectly seasoned rice. What makes this particular sushi roll so special? It’s the delightful balance. The subtle heat from the spicy mayonnaise cuts through the richness, creating a symphony of tastes and textures that keeps you coming back for another bite. Whether you’re a seasoned sushi aficionado or a curious newcomer, mastering the art of making your own Kani sushi at home is an incredibly rewarding experience. Imagin extracte impressing your friends and family with these delicious, homemade spicy crab rolls – it’s easier than you think, and the satisfaction of creating your own authentic Kani sushi is truly unmatched.
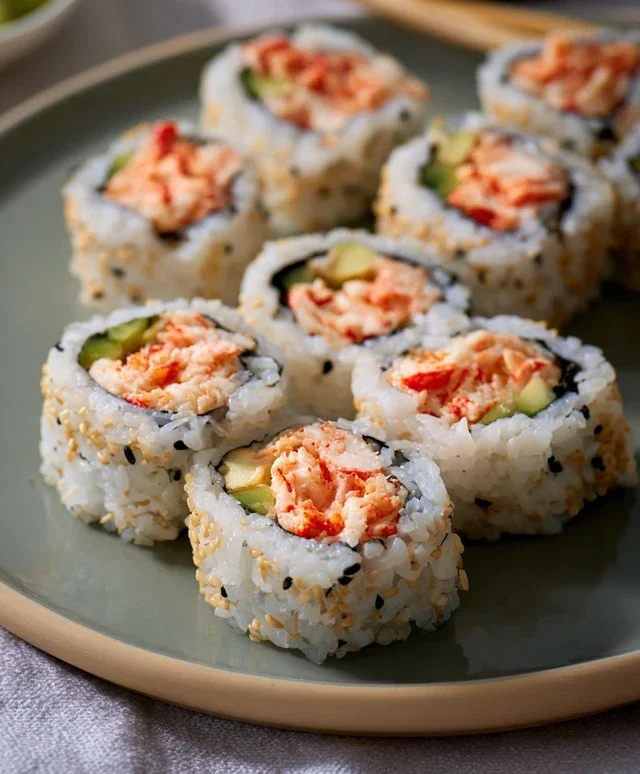
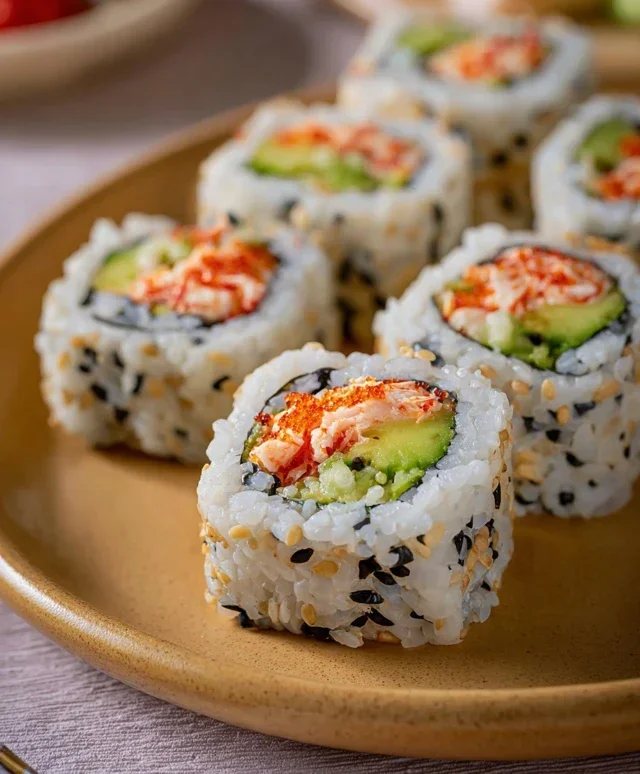
Kani Sushi (Spicy Crab Roll)
There’s something incredibly satisfying about making your own sushi at home. It’s a little bit of an art form, a bit of a culinary adventure, and the end result is always so rewarding. One of my absolute favorite rolls to make, and to eat, is the Spicy Kani Roll. It’s got that perfect balance of creamy, spicy, and fresh, making it a crowd-pleaser every single time. Forget expensive restaurant rolls; this recipe will show you how to create delicious, restaurant-quality spicy crab rolls right in your own kitchen. We’ll break it down step-by-step, and I promise it’s more accessible than you might think. The key is to have all your ingredients prepped and ready, and to take your time with the rice – it’s the foundation of any great sushi.
Ingredients:
Crafting the Perfect Sushi Rice
The rice is truly the heart of any sushi roll. Getting it right is crucial for both texture and flavor. We want it to be slightly sticky, perfectly seasoned, and fluffy, not mushy.
1. Rinsing the Rice: First things first, thoroughly rinse your short-grain sushi rice. This is a vital step that removes excess starch, which can make the rice gummy. Place the rice in a fine-mesh sieve and rinse it under cold running water, gently swirling the rice with your hand, until the water runs clear. This might take a few minutes and several rinses, but it’s worth the effort. Drain the rice very well.
2. Cooking the Rice: Combine the rinsed and drained rice with the 2 cups of water in a medium saucepan. Bring it to a boil over medium-high heat, then immediately reduce the heat to low, cover tightly, and simmer for 15 minutes. Resist the urge to lift the lid during this time – steam is your friend! After 15 minutes, remove the pot from the heat and let it steam, still covered, for another 10 minutes. This gentle steaming process ensures the rice cooks evenly and becomes tender.
3. Seasoning the Sushi Vinegar: While the rice is steaming, prepare your sushi vinegar. In a small bowl, whisk together the unseasoned rice vinegar, granulated sugar, and salt until the sugar and salt are completely dissolved. You can gently warm this mixture for about 30 seconds in the microwave or on the stovetop if you find it helps the sugar and salt dissolve more easily, but it’s not strictly necessary.
4. Seasoning the Rice: Once the rice has finished steaming, transfer it to a large, non-metallic bowl (wood or glass is ideal, as metal can react with the vinegar). Gently spread the hot rice with a rice paddle or a wide spatula. Drizzle the seasoned vinegar mixture evenly over the hot rice. Using your paddle, “cut” and fold the rice with a slicing motion, trying not to mash it. Continue to gently fold and mix until the vinegar is evenly distributed and the rice is glossy. Fan the rice as you mix (a hand fan or even a piece of cardboard works great!) to cool it down quickly and give it that characteristic sheen. Let the rice cool to room temperature before proceeding. It should be just warm enough to handle comfortably.
Preparing the Spicy Kani Filling
This is where the “spicy” in our Spicy Kani Roll comes in! It’s a simple, creamy, and flavorful mixture that complements the rice and nori beautifully.
1. Making the Spicy Mayo: In a small bowl, combine the Kewpie mayonnaise, sriracha, lime juice, and sesame oil. Kewpie mayonnaise is a Japanese mayonnaise that has a richer, tangier flavor than American mayonnaise, and it’s the secret to that authentic creamy texture. Whisk everything together until it’s smooth and well combined. Taste it and adjust the sriracha or lime juice to your preference for spiciness and tang.
2. Combining with Crab: Take your thinly sliced imitation crab meat and place it in a medium bowl. Add about half of the prepared spicy mayo mixture to the crab meat. Gently toss to coat the crab meat evenly. You want a good, creamy coating, but don’t drown it. You can add more spicy mayo if needed, reserving some for drizzling on top later. The lime juice and sesame oil add a subtle but essential layer of flavor to the crab mixture.
Assembling Your Spicy Kani Rolls
Now for the fun part – rolling! This is where everything comes together. You’ll need a bamboo sushi mat (makisu) for this, which makes rolling a breeze. If you don’t have one, you can improvise with plastic wrap, but a mat is highly recommended.
1. Setting Up Your Rolling Station: Cover your bamboo mat with a layer of plastic wrap. This prevents the rice from sticking to the mat and makes cleanup much easier. Place one half-sheet of nori, shiny side down, on top of the plastic-wrapped mat, with the longer side facing you. Have your cooled sushi rice, spicy kani mixture, sliced avocado, julienned cucumbers, and toasted sesame seeds within easy reach.
2. Spreading the Rice: Moisten your hands with a little water or a mixture of water and rice vinegar to prevent the rice from sticking to your fingers. Take about a quarter of the prepared sushi rice and spread it evenly over the nori sheet, leaving about a 1-inch border at the top edge (the edge furthest from you). Don’t press the rice down too firmly; you want it to be light and fluffy. You can also sprinkle some toasted sesame seeds over the rice at this stage if you like.
3. Adding the Fillings: Arrange a generous portion of your spicy kani mixture in a line across the rice, about one-third of the way up from the bottom edge (the edge closest to you). Lay a few slices of avocado next to the kani mixture and then a few strips of julienned cucumber. Be careful not to overfill the roll, as this can make it difficult to close. Less is more when you’re starting out.
4. Rolling the Sushi: This is the technique that takes a little practice, but don’t be discouraged if your first few rolls aren’t perfect. Lift the edge of the bamboo mat closest to you, bringin extractg it up and over the filling. Tuck the edge of the nori under the filling, encasing it. Use your fingers to hold the filling in place as you roll. Continue to roll the mat forward, applying gentle but firm pressure to create a tight, even roll. As you reach the end, use the exposed border of nori to seal the roll. You can moisten this border with a little water if needed. Once rolled, gently shape the roll into a cylinder by pressing the mat around it.
5. Slicing and Serving: Carefully unwrap your finished roll. Using a very sharp knife, slice the roll into 6 to 8 pieces. It’s best to wipe the knife with a damp cloth between each cut to prevent the rice from sticking. Arrange your beautiful Spicy Kani Rolls on a serving platter. Drizzle a little extra spicy mayo on top of each roll, and sprinkle with more toasted sesame seeds for an extra pop of flavor and visual appeal. Serve immediately with soy sauce for dipping. Enjoy the fruits of your labor!
Conclusion:
And there you have it! You’ve now got the blueprint to create your very own delicious Kani Sushi (Spicy Crab Roll). This recipe is fantastic because it’s surprisingly accessible for home cooks, offering that vibrant, spicy kick you crave without needing advanced sushi-making skills. The creamy crab filling, balanced with the subtle heat, makes for an incredibly satisfying bite that’s perfect for a fun weeknight dinner, a party appetizer, or just a treat for yourself. I love serving these rolls with a side of soy sauce, pickled gin extractger, and a dollop of wasabi for that authentic experience. Don’t be afraid to get creative with variations – try adding a sprinkle of toasted sesame seeds for extra crunch, or a thin slice of avocado for added creaminess. For a different heat profile, experiment with sriracha mayo or a touch of gochujang. I truly encourage you to dive in and give this Kani Sushi recipe a go. You might just discover your new favorite sushi roll!
Frequently Asked Questions:
Can I use real crab meat instead of imitation crab (kani)?
Absolutely! While imitation crab is traditional and convenient for Kani Sushi, using real lump crab meat will elevate the flavor and texture. If you opt for real crab, ensure it’s well-drained of excess liquid before mixing it with your spicy mayo and other seasonings.
What if I don’t like spicy food?
No problem at all! You can easily adjust the spice level of your Kani Sushi. Start with a smaller amount of sriracha or chili garlic sauce in your spicy mayo mixture, taste it, and add more gradually until it reaches your desired heat. You can even omit the spicy sauce altogether and make a simple creamy crab roll.
Kani Sushi (Spicy Crab Roll)
A popular sushi roll featuring a creamy and spicy imitation crab filling, fresh avocado, and crisp cucumber, wrapped in nori and sushi rice.
Ingredients
-
1 1/2 cups short grain sushi rice (uncooked)
-
2 cups water
-
3 tablespoons unseasoned rice vinegar
-
1 tablespoon granulated sugar
-
1 teaspoon salt
-
9 sticks imitation crab meat (thinly sliced)
-
1/4 cup Kewpie mayonnaise
-
1 tablespoon sriracha
-
1/2 teaspoon lime juice
-
1/8 teaspoon sesame oil
-
1 avocado (thinly sliced)
-
2 persian cucumbers (julienned)
-
3 Nori Sheets (cut in half)
-
toasted sesame seeds (black and white)
-
Soy sauce
Instructions
-
Step 1
Rinse sushi rice until water runs clear. Combine rice and water in a saucepan and bring to a boil. Reduce heat, cover, and simmer for 20 minutes. Let stand, covered, for 10 minutes. -
Step 2
In a small bowl, whisk together rice vinegar, sugar, and salt until dissolved. Gently fold this mixture into the cooked sushi rice. -
Step 3
In another bowl, mix imitation crab meat, Kewpie mayonnaise, sriracha, lime juice, and sesame oil until well combined. -
Step 4
Place a nori sheet (shiny side down) on a bamboo sushi mat. Wet your hands to prevent sticking and spread a thin, even layer of sushi rice over the nori, leaving a 1-inch border at the top. -
Step 5
Spread a line of the spicy crab mixture horizontally across the rice, about one-third of the way from the bottom. Top with avocado slices and julienned cucumber. -
Step 6
Using the bamboo mat, carefully roll the nori from the bottom up, tucking in the filling. Press firmly to create a tight roll. Moisten the top border of the nori with water to seal the roll. -
Step 7
Slice the roll into 6-8 pieces using a sharp, wet knife. Sprinkle with toasted sesame seeds and serve with soy sauce.
Important Information
Nutrition Facts (Per Serving)
It is important to consider this information as approximate and not to use it as definitive health advice.
Allergy Information
Please check ingredients for potential allergens and consult a health professional if in doubt.