Easy Homemade Fruit Leather Recipe – Sweet & Healthy Treat
Homemade Fruit Leather Recipe: Get ready to unlock a world of pure, unadulterated fruity goodness with this incredibly simple yet surprisingly delightful homemade fruit leather recipe. Forget those store-bought versions laden with artificial flavors and excessive sugars; we’re diving deep into the vibrant essence of real fruit, transforming it into chewy, satisfying strips that kids and adults alike can’t resist. There’s something undeniably magical about capturing the concentrated sweetness and vibrant colors of your favorite seasonal fruits in a portable, snackable form. What makes this homemade fruit leather recipe so special is its incredible versatility. Whether you’re craving the tang of berries, the tropical punch of mango, or the comforting sweetness of apples, the possibilities are truly endless. It’s the perfect way to preserve peak-season produce, reduce food waste, and create a healthy, wholesome treat that will have everyone asking for seconds.
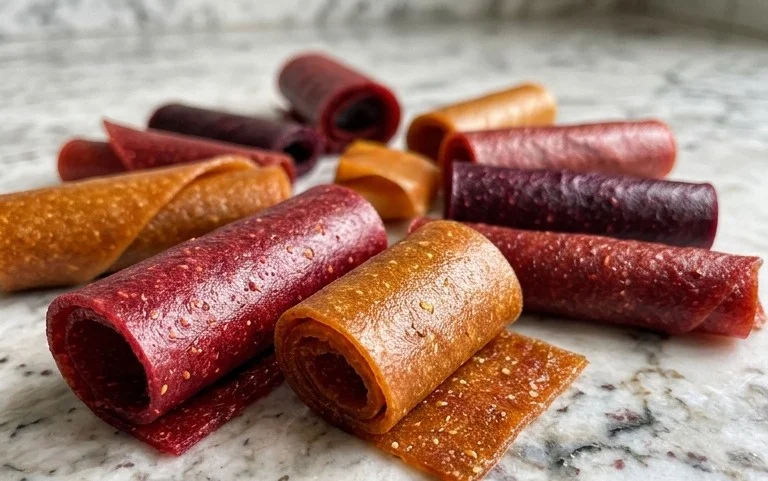
Homemade Fruit Leather Recipe
Making your own fruit leather is a wonderfully rewarding and surprisingly simple process. It’s a fantastic way to preserve the season’s freshest fruit, and the result is a chewy, naturally sweet treat that kids and adults alike adore. Unlike store-bought versions that can be packed with artificial colors and flavors, our homemade fruit leather is bursting with pure, unadulterated fruit goodness. Plus, it’s endlessly customizable! Whether you have a bounty of berries, a surplus of stone fruit, or a forgotten bunch of apples, you can transform them into delicious fruit leather. Today, we’re going to guide you through making a simple yet delicious fruit leather using a base recipe that you can adapt to your favorite fruits. Get ready to unleash your inner fruit wizard!
Ingredients:
Equipment You’ll Need:
Instructions:
Step 1: Prepare Your Fruit
The first and most crucial step is to prepare your chosen fruit. Wash your fruit thoroughly. If you are using fruits like apples or pears, you’ll want to core them and then chop them into roughly uniform pieces. For berries, a quick rinse is usually all they need. If you’re working with stone fruits like peaches or plums, you’ll want to pit them and then chop them. The goal here is to create pieces that will blend easily into a smooth puree. If you’re using frozen fruit, there’s no need to thaw it completely; you can often use it straight from the freezer, as the blending process will break it down. Remember, the better you prepare your fruit, the smoother your fruit leather will be.
Step 2: Blend Everything Together
Now comes the fun part! Place your chopped fruit into a blender or food processor. Add the 3 tablespoons of white sugar and the juice from half a lemon. The lemon juice is a secret weapon; it not only adds a delightful tartness that balances the sweetness of the fruit but also helps to maintain the vibrant color of your fruit leather, preventing it from turning a dull brown during the drying process. Blend this mixture until it is completely smooth and puréed. You’re aiming for a consistency similar to applesauce, with no large chunks of fruit remaining. If your blender is struggling, you can add a tablespoon or two of water, but try to keep the mixture as thick as possible for the best results. A thick puree will lead to a chewier, more robust fruit leather.
Step 3: Spread and Shape Your Leather
Preheat your oven to its lowest setting, ideally around 170°F (77°C). Line a baking sheet with parchment paper or a silicone baking mat. This is essential to prevent your fruit leather from sticking to the pan. Pour your fruit puree onto the prepared baking sheet. Using a spatula, spread the puree into an even, thin layer. Aim for a thickness of about ¼ inch. The thinner you spread it, the quicker it will dry and the chewier it will be. Try to get the edges as neat as possible; this will make cutting your fruit leather into strips easier later on. Don’t worry if it’s not perfectly uniform; rustic charm is part of the appeal!
Step 4: The Drying Process
Carefully place the baking sheet into your preheated oven. Now, the patience part begin extracts. You’ll need to let the fruit leather dry for a considerable amount of time. This can range from 4 to 8 hours, depending on your oven, the thickness of your puree, and the humidity in your kitchen. You’re looking for the fruit leather to be no longer sticky to the touch, but still pliable. It should peel away cleanly from the parchment paper. To speed up the drying process and ensure even cooking, you can prop the oven door open slightly with a wooden spoon. This allows moisture to escape, preventing the fruit leather from steaming and helping it to dry out properly. Check on it periodically, especially in the later stages, to avoid over-drying and making it brittle.
Step 5: Cool and Cut Your Fruit Leather
Once the fruit leather is dried to your liking, remove the baking sheet from the oven. Let the fruit leather cool completely on the baking sheet. This is important because it will firm up as it cools. Once it’s cool to the touch and you can peel it cleanly off the parchment paper, you’re ready to cut it. You can cut it into strips, squares, or even use cookie cutters for fun shapes. If you find it’s still a little sticky, you can lightly dust the back with a little cornstarch or powdered sugar before cutting. Store your finished fruit leather in an airtight container at room temperature for a few days, or for longer storage, wrap individual strips in parchment paper or plastic wrap and keep them in the refrigerator or freezer. Enjoy your delicious, homemade fruit leather!
Conclusion:
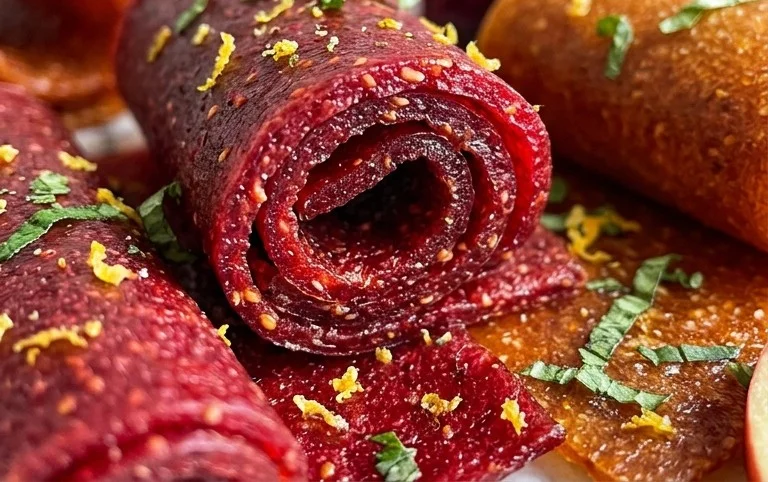
Embarking on the journey of making your own fruit leather is incredibly rewarding! This homemade fruit leather recipe offers a fantastic way to preserve the natural sweetness of your favorite fruits, creating a healthy and delicious snack that’s far superior to store-bought alternatives. It’s simple, fun, and the results are always impressive. Whether you’re looking for a guilt-free treat for yourself, a nutritious lunchbox addition for the kids, or a unique party favor, homemade fruit leather truly shines. I encourage you to gather your ripest fruits and give this recipe a try – you won’t be disappointed!
The beauty of this recipe lies in its versatility. Enjoy it as a chewy, sweet snack on its own, roll it up for an easy-to-eat treat, or even chop it into small pieces to sprinkle over yogurt or oatmeal. For variations, don’t be afraid to experiment with different fruit combinations! Think strawberry-banana, apple-cinnamon, or even a tropical blend of mango and pineapple. Adding a touch of gin extractger or a hint of vanilla extract can also elevate the flavor profile. The possibilities are endless, making each batch a unique adventure.
Frequently Asked Questions:
Can I make fruit leather without a dehydrator?
Absolutely! While a dehydrator is convenient, you can easily make fruit leather in your oven. Simply spread the pureed fruit onto a baking sheet lined with parchment paper and bake at a very low temperature (around 140-170°F or 60-75°C), with the oven door slightly ajar, until it’s no longer sticky. This process will take several hours, so patience is key!
How long does homemade fruit leather last?
When stored properly in an airtight container at room temperature, your homemade fruit leather should last for about 2-3 weeks. For longer storage, you can wrap individual pieces tightly in plastic wrap and keep them in the refrigerator for up to a month, or even freeze them for several months.
My fruit leather is too sticky. What did I do wrong?
The most common reason for overly sticky fruit leather is not cooking it long enough. It needs to be dried to the point where it’s firm to the touch and doesn’t leave residue on your fingers. You might need to bake or dehydrate it for an additional hour or two. Ensure your oven temperature is low and consistent to avoid burning.
Homemade Fruit Leather
Easy homemade fruit leather made with fresh fruit, sugar, and lemon juice. A healthy and delicious snack.
Ingredients
-
2 cups fruit, chopped
-
3 tbsp white sugar
-
½ whole lemon, just the juice
-
1 tsp vanilla extract
-
1 pinch cinnamon
Instructions
-
Step 1
Puree the fruit in a blender or food processor until smooth. -
Step 2
Stir in the white sugar, lemon juice, vanilla extract, and cinnamon. -
Step 3
Pour the mixture onto a baking sheet lined with parchment paper. -
Step 4
Spread evenly to about 1/8 inch thickness. -
Step 5
Bake at 170°F (77°C) for 2-4 hours, or until the fruit leather is no longer sticky. -
Step 6
Let cool completely, then cut into strips or shapes.
Important Information
Nutrition Facts (Per Serving)
It is important to consider this information as approximate and not to use it as definitive health advice.
Allergy Information
Please check ingredients for potential allergens and consult a health professional if in doubt.