Dairy-Free Pesto Recipe – Easy & Delicious
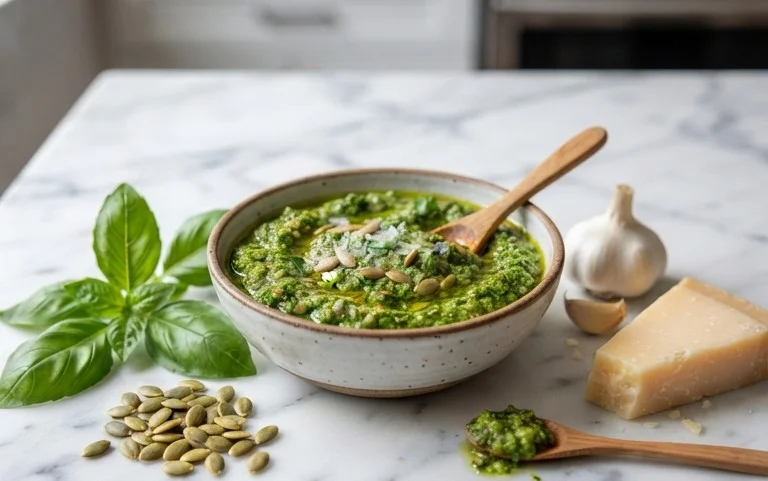
Dairy Free Pesto is a revelation, and I’m so excited to share this vibrant, flavorful recipe with you! For so long, I thought pesto was off-limits due to its traditional Parmesan cheese component. But what if I told you we could capture that same herbaceous, garlicky, nutty goodness without a single drop of dairy? That’s exactly what we’ve achieved with this incredible dairy free pesto. It’s unbelievably versatile, transforming simple pasta dishes into culinary masterpieces, elevating grilled vegetables, and even acting as a delicious spread for sandwiches. The secret lies in the perfect balance of fresh basil, toasted pine nuts (or even walnuts for a budget-friendly twist!), garlic, good quality olive oil, and a touch of nutritional yeast to mimic that savory umami depth. This isn’t just a substitute; it’s a stand-alone star that celebrates the pure, bright flavors of its ingredients.
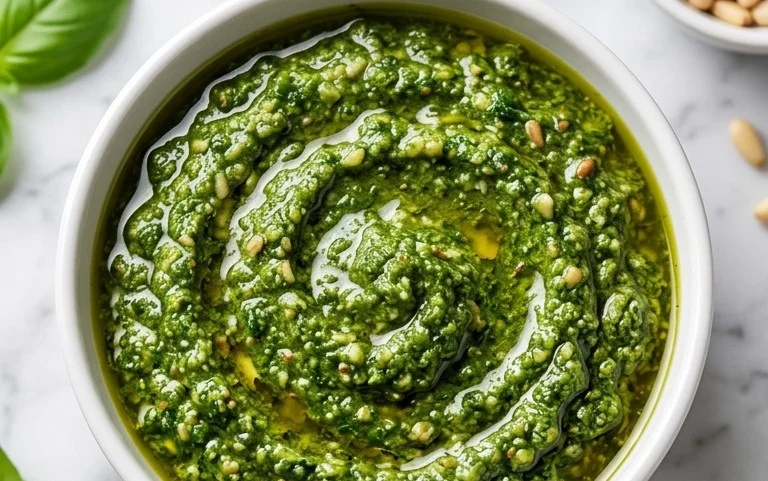
Dairy Free Pesto
Pesto is one of those magical sauces that can elevate a simple meal into something truly special. Traditionally, it’s made with Parmesan cheese, but for those of us who are dairy-free, that often means missing out on this vibrant, herbaceous delight. Well, no more! This dairy-free pesto recipe is incredibly easy to make, bursting with fresh basil flavor, and perfectly creamy without a drop of dairy. It’s a game-changer for pasta, sandwiches, dips, and so much more. I love having a batch of this on hand because it’s so versatile and takes just minutes to whip up. Let’s get started on creating this delicious dairy-free wonder!
Ingredients:
Crafting Your Dairy-Free Pesto: Step-by-Step
Making pesto is wonderfully straightforward, and you don’t need any fancy equipment. A food processor is ideal, but a high-powered blender can also work. The key is to pulse the ingredients until you achieve your desired consistency – some people like it smoother, others prefer a bit more texture. Don’t be afraid to adjust the seasoning to your personal preference!
Step 1: Prepare Your Base
Begin extract by gathering all your ingredients. Wash your basil leaves thoroughly and pat them dry. Excess moisture can affect the texture and shelf life of your pesto. For this recipe, we’ll be using the zest of the lemon for an extra burst of citrusy aroma, in addition to the juice. Zest the half lemon before you juice it. Set aside the lemon zest and juice. If you’re using pine nuts, you can lightly toast them in a dry skillet over medium heat for a few minutes until fragrant. This step is optional, but it really enhances their nutty flavor and can add a lovely depth to the pesto. Keep a close eye on them as they can burn quickly. Let them cool slightly before adding them to the food processor.
Step 2: Combine the Dry Ingredients and Aromatics
In the bowl of your food processor, add the toasted (or untoasted) pine nuts, the peeled garlic cloves, and the lemon zest. If you’re using nutritional yeast, add it now as well. Nutritional yeast is a deactivated yeast with a cheesy, nutty, and savory flavor profile that’s a fantastic dairy-free alternative to Parmesan cheese in recipes like this. It’s a staple in many vegan and dairy-free kitchens for good reason. Pulse these ingredients a few times until they are roughly chopped. This will help to break down the nuts and garlic evenly, creating a good foundation for the pesto.
Step 3: Introduce the Basil and Salt
Now, add the fresh basil leaves to the food processor. It might look like a lot of basil, but it will wilt down significantly. Add the 1/2 teaspoon of salt at this stage. Salt not only enhances the flavors but also acts as a mild preservative. If you find your pesto a little bland after it’s made, you can always add more salt. Pulse the mixture again, scraping down the sides of the bowl as needed, until the basil is finely chopped and incorporated with the nut and garlic mixture. You’re looking for a nice green, slightly chunky paste at this point.
Step 4: Emulsify with Olive Oil and Lemon Juice
With the food processor running on a low speed, slowly drizzle in the 1/4 cup of extra virgin extract olive oil. Drizzling the oil slowly allows it to emulsify with the other ingredients, creating a smoother, richer texture. Once the oil is incorporated, add the juice of half a lemon. The lemon juice adds a bright, fresh acidity that balances the richness of the olive oil and nuts and complements the basil beautifully. Continue to process until the pesto reaches your desired consistency. Some people prefer a chunkier pesto, while others like it smoother. If you prefer a smoother pesto, process for a bit longer. If you want more texture, stop a little earlier.
Step 5: Taste and Adjust for Perfection
This is the most important step! Stop the food processor and taste your delicious dairy-free pesto. Does it need more salt? A little more tang from the lemon juice? If you didn’t add nutritional yeast, this is also where you might miss that cheesy depth, but the pesto will still be fantastic. If you want it richer or a different consistency, you can add a little more olive oil, a splash more lemon juice, or even a tiny bit more salt. Remember, seasoning is personal, so don’t be afraid to adjust until it tastes absolutely perfect to you. Once you’re happy with the flavor, give it one final quick pulse to ensure everything is well combined. Your vibrant, dairy-free pesto is now ready to be enjoyed!
This dairy-free pesto is incredibly versatile. Toss it with your favorite pasta for a quick and flavorful meal. Spread it on toasted bread for a gourmet sandwich or bruschetta. Use it as a dip for vegetables or a flavorful topping for grilled chicken or fish. You can store it in an airtight container in the refrigerator for up to a week, or freeze it in ice cube trays for longer storage. Enjoy the delicious, fresh taste of homemade pesto, completely dairy-free!
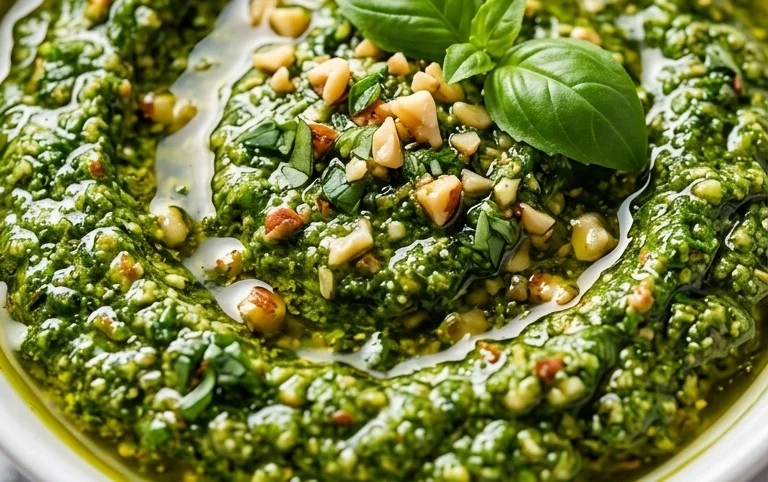
Conclusion:
I hope you’re as excited as I am to dive into this delicious dairy free pesto recipe! It’s a game-changer, offering all the vibrant, herbaceous flavor of traditional pesto without any dairy. This recipe is fantastic because it’s incredibly versatile, quick to whip up, and perfect for anyone with dairy sensitivities or simply looking to explore plant-based options. The bright basil, nutty pine nuts (or other nuts!), pungent garlic, and zesty lemon all come together to create a truly irresistible sauce.
Don’t limit yourself to just pasta! This dairy free pesto is wonderful tossed with warm pasta, spread on crusty bread as a topping, dolloped onto grilled vegetables, or even as a flavorful base for pizzas. You can also easily customize it. Feel free to swap out the pine nuts for walnuts, almonds, or sunflower seeds for a different nutty profile. Experiment with adding a pinch of red pepper flakes for a hint of heat, or even a different herb like arugula for a peppery kick.
I truly encourage you to give this dairy free pesto a try. It’s a simple way to elevate your meals and enjoy a classic flavor in a new, inclusive way. Happy cooking!
Frequently Asked Questions:
Can I freeze dairy free pesto?
Absolutely! This dairy free pesto freezes beautifully. For best results, pour it into ice cube trays and freeze until solid. Once frozen, transfer the pesto cubes to a freezer-safe bag or container. This makes it easy to thaw just the amount you need for a quick meal.
What if I don’t have pine nuts?
No problem at all! You can substitute pine nuts with a variety of other nuts or seeds. Toasted walnuts, blanched almonds, or even sunflower seeds are excellent alternatives and provide a similar nutty depth to the pesto.
Dairy Free Pesto
A vibrant and flavorful dairy-free pesto recipe, perfect for pasta, sandwiches, and more.
Ingredients
-
3 cups basil
-
1/2 lemon (juiced)
-
1/2 cup pine nuts
-
2 cloves garlic
-
1/4 cup olive oil
-
1/2 tsp salt
-
2 tbsp nutritional yeast
Instructions
-
Step 1
In a food processor, combine the basil, pine nuts, and garlic. -
Step 2
Pulse until the ingredients are roughly chopped. -
Step 3
Add the lemon juice, olive oil, and salt. Continue to process until the pesto is smooth. -
Step 4
If using, add the nutritional yeast and process again until combined. -
Step 5
Taste and adjust seasoning as needed. -
Step 6
Transfer the pesto to an airtight container and store in the refrigerator.
Important Information
Nutrition Facts (Per Serving)
It is important to consider this information as approximate and not to use it as definitive health advice.
Allergy Information
Please check ingredients for potential allergens and consult a health professional if in doubt.