Brown Butter Brookies-Irresistible Chocolate Chip Cookie Brownie Bars
Brown butter brookies are the ultimate indulgence, a perfect marriage of two beloved desserts that will send your taste buds into overdrive. If you’ve ever dreamt of a chewy chocolate chip cookie meeting a rich, fudgy brownie, then this is the recipe for you. We’re talking about a symphony of textures and flavors where the nutty depth of browned butter elevates both the cookie and the brownie layers to an entirely new level. The magic truly happens when that slightly caramelized, almost toffee-like essence of brown butter infuses every bite. It’s what transforms a good dessert into an unforgettable one. Prepare yourselves, because these brown butter brookies are about to become your new go-to treat, guaranteed to impress everyone lucky enough to get a slice.
Brown Butter Brookies
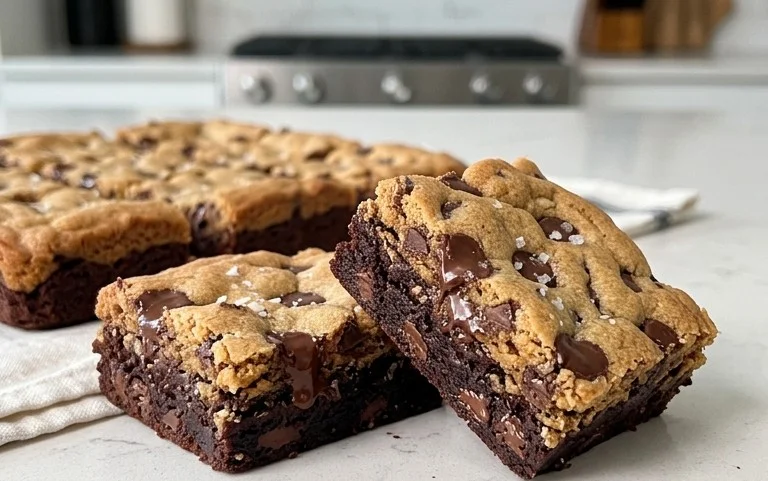
Get ready for a dessert experience that’s truly next level. These Brown Butter Brookies are a glorious marriage of rich, fudgy brownies and chewy, decadent chocolate chip cookies, all elevated by the nutty, caramel notes of browned butter. If you’re a fan of both brownies and cookies, this recipe is your ultimate dream come true. The magic happens when you swirl the two batters together, creating an irresistible mosaic of textures and flavors in every bite. The base of the brownie is intensely chocolatey, while the cookie layer offers that classic, comforting sweetness with delightful pockets of melted chocolate. And that browned butter? It’s the secret weapon that infuses everything with an unparalleled depth of flavor. Trust me, once you try these, you’ll be making them again and again.
Ingredients:
Instructions:
Step 1: Prepare the Brownie Batter – The Heart of the Brookie
First things first, we’re going to create the decadent brownie base. You’ll need a saucepan for this. Add the 180g of butter to the saucepan and melt it over medium heat. Once melted, continue to cook it, swirling the pan occasionally. You’ll notice the butter start to foam, and then small brown bits will begin extract to form at the bottom. This is the magic of browning butter! It will start to smell wonderfully nutty and caramel-like. Keep a close eye on it; we want a beautiful golden-brown color, not burnt. Once it reaches that perfect hue, immediately remove it from the heat and pour it into a heatproof bowl to stop the cooking process.
In a separate, large mixing bowl, combine the 320g of chopped chocolate (or chocolate wafers) with the browned butter. Stir gently until the chocolate is completely melted and you have a smooth, glossy mixture. This is where the intense chocolate flavor really starts to develop.
Now, in a medium bowl, whisk together the 120g of all-purpose flour, 50g of cocoa powder, 180g of granulated sugar, 80g of brown sugar, and 2g of salt. Add this dry mixture to the melted chocolate and butter mixture. Stir until just combined; don’t overmix at this stage. Finally, whisk in the 4 eggs, one at a time, until each egg is fully incorporated. You’re looking for a thick, rich batter. If you’re using chocolate chunks (and I highly recommend it for those extra gooey pockets!), gently fold them into the brownie batter now. Set this luscious brownie batter aside.
Step 2: Crafting the Perfectly Chewy Cookie Dough
Next, we move on to the cookie layer. In a medium saucepan, melt the 80g of butter over medium heat. Continue to cook it, just like you did for the brownie batter, until it turns a beautiful golden brown and smells nutty. This will infuse our cookie dough with that incredible brown butter flavor. Pour the browned butter into a mixing bowl and let it cool slightly.
To the cooled brown butter, add the 80g of brown sugar and 40g of granulated sugar. Whisk them together until well combined. Then, beat in the 1 egg until the mixture is smooth and creamy.
In a separate bowl, whisk together the 85g of all-purpose flour and 1g of salt. Gradually add this dry mixture to the wet ingredients, stirring until just combined. Be careful not to overmix here, as this can lead to tough cookies. The dough should be thick and slightly sticky.
Step 3: Assembling the Brookie Masterpiece
Now comes the exciting part: bringin extractg our two delicious components together. You’ll need a 9×13 inch baking pan. I like to line mine with parchment paper, leaving an overhang on the sides. This makes it incredibly easy to lift the brookies out of the pan once they’re baked.
Pour the brownie batter into the prepared baking pan and spread it out evenly to form the base layer. Now, dollop spoonfuls of the cookie dough all over the top of the brownie batter. Don’t worry about making them perfect or covering every single inch; the beauty of brookies is in the beautiful, marbled effect. Some of the brownie batter will peek through, and that’s exactly what we want.
Step 4: Creating the Signature Swirl
This is where the artistry comes in! Using a butter knife or a small offset spatula, gently swirl the cookie dough into the brownie batter. Be careful not to over-swirl; you want distinct ribbons of cookie dough and brownie, not a uniform blend. Think of it as painting with batter! The goal is to create beautiful patterns that will bake up into an enticing mosaic. This swirling technique not only looks gorgeous but also ensures you get a perfect bite of both brownie and cookie in every piece.
Step 5: Baking to Golden Perfection
Preheat your oven to 350°F (175°C). Place the assembled brookies in the preheated oven and bake for approximately 30-35 minutes. You’ll know they’re ready when the edges of the brownie layer are set and slightly pulling away from the sides of the pan, and the cookie dough is golden brown and looks cooked through. A toothpick inserted into the center should come out with moist crum extractbs attached, but not wet batter. Resist the urge to overbake, as this will result in dry brookies.
Once baked, remove the pan from the oven and let the brookies cool completely in the pan on a wire rack. This is crucial for them to set properly. I know it’s hard to wait, but patience will be rewarded! Once cooled, use the parchment paper overhang to lift the entire slab out of the pan. Cut them into squares and prepare to be amazed by the incredible layers and textures. Enjoy your homemade Brown Butter Brookies!
Conclusion:
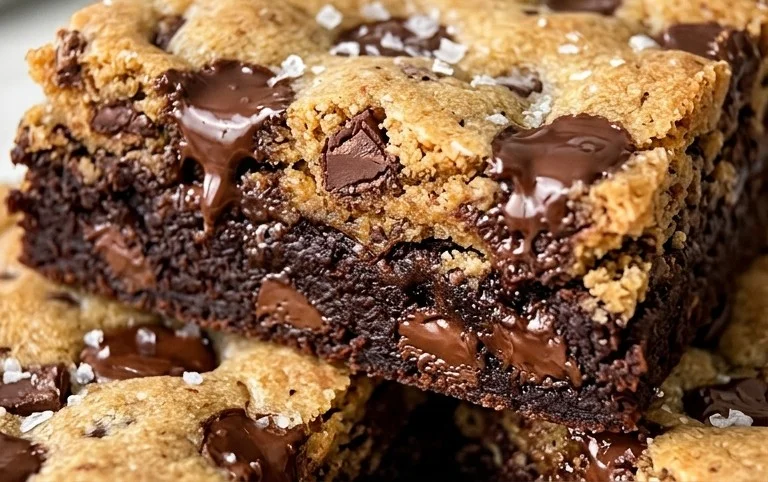
So there you have it – the ultimate guide to creating these decadent Brown Butter Brookies! I truly believe this recipe is a winner because it perfectly marries the chewy, rich goodness of a brownie with the delicate crispness and nutty aroma of a classic cookie. The secret weapon, of course, is that glorious brown butter, which elevates both components to a whole new level of deliciousness. Imagin extracte a warm, fudgy brownie base swirled with pockets of sweet chocolate chip cookie dough, all infused with that irresistible caramel-like flavor. Pure bliss!
When it comes to serving, these brookies are incredibly versatile. They’re fantastic on their own, perhaps with a glass of cold milk, but I also love them slightly warmed, especially when topped with a scoop of vanilla bean ice cream. For a touch of elegance, a drizzle of salted caramel or a sprinkle of flaky sea salt can really make them sing. Don’t be afraid to get creative with variations! You could add chopped nuts like walnuts or pecans to the cookie dough layer for extra crunch, or even swirl in some peanut butter or Biscoff spread for a flavor twist. This Brown Butter Brookie recipe is designed to be both approachable for begin extractners and satisfying for experienced bakers. I really encourage you to give it a try – I promise it will become a new favorite in your baking repertoire!
Frequently Asked Questions about Brown Butter Brookies:
How do I properly brown the butter?
To brown butter, melt your unsalted butter in a light-colored saucepan over medium heat. Swirl the pan occasionally. The butter will foam, then start to subside, and you’ll notice small brown bits forming at the bottom. Keep a close eye on it, as it can go from perfectly browned to burnt very quickly. Once you see those golden-brown specks and smell a nutty, caramel-like aroma, immediately remove it from the heat and pour it into a heatproof bowl to stop the cooking process.
Can I make these brookies ahead of time?
Absolutely! Brown Butter Brookies are excellent for making ahead. Once cooled completely, you can store them in an airtight container at room temperature for up to 3-4 days. For longer storage, they freeze beautifully. Cut them into individual servings, wrap them tightly, and freeze for up to 2-3 months. Thaw at room temperature before enjoying. They also reheat wonderfully in a low oven or microwave for that freshly baked experience.
Brown Butter Brookies
A decadent fusion of rich brown butter blondies and fudgy chocolate brownies, creating a truly irresistible treat.
Ingredients
-
180 g butter
-
320 g chocolate (for melting – 60% chocolate bars)
-
120 g all purpose flour
-
50 g cocoa powder
-
180 g Granulated Sugar
-
80 g brown sugar
-
2 g salt
-
4 eggs
-
120 g chocolate chunks (optional – chopped up chocolate bar or chocolate chips)
-
85 g all-purpose flour
-
80 g butter
-
80 g brown sugar
-
40 g granulated sugar
-
1 g salt
-
1 egg
Instructions
-
Step 1
For the brownie layer: Melt 180g butter in a saucepan over medium heat, stirring occasionally, until it turns golden brown and smells nutty. Remove from heat. Stir in 320g chopped chocolate until smooth. In a separate bowl, whisk together 180g granulated sugar, 80g brown sugar, and 2g salt. Whisk in 4 eggs one at a time until well combined. Gradually fold the chocolate mixture into the sugar mixture. Finally, gently fold in 120g all-purpose flour and 50g cocoa powder until just combined. Pour into a greased and floured 9×13 inch baking pan. -
Step 2
For the blondie layer: In a medium bowl, melt 80g butter. Stir in 80g brown sugar and 40g granulated sugar until combined. Whisk in 1 egg. Gently fold in 85g all-purpose flour and 1g salt until just combined. Stir in optional 120g chocolate chunks. -
Step 3
Dollop spoonfuls of the blondie batter over the brownie batter in the baking pan. Use a knife or skewer to gently swirl the blondie batter into the brownie batter, creating marbled effects. -
Step 4
Bake in a preheated oven at 175°C (350°F) for 30-35 minutes, or until a toothpick inserted into the center comes out with moist crumbs (not wet batter). -
Step 5
Let the brookies cool completely in the pan on a wire rack before cutting into squares.
Important Information
Nutrition Facts (Per Serving)
It is important to consider this information as approximate and not to use it as definitive health advice.
Allergy Information
Please check ingredients for potential allergens and consult a health professional if in doubt.