Easy Chocolate Protein Pudding Recipe – Healthy Treat
Chocolate Protein Pudding Recipe: Let’s be honest, who doesn’t crave a rich, decadent chocolate dessert? But what if I told you that you can indulge your sweet tooth without derailing your health goals? That’s exactly what this Chocolate Protein Pudding Recipe delivers. It’s the perfect guilt-free treat that satisfies those deep chocolate cravings while packing a powerful protein punch. We all love pudding for its creamy, smooth texture and intense flavor, and this version takes that beloved comfort food to a whole new level. What makes this recipe truly special is its incredible versatility and the fact that it’s so surprisingly easy to make. Whether you’re an athlete looking for post-workout recovery, someone trying to increase their daily protein intake, or simply a chocolate lover seeking a healthier alternative, this Chocolate Protein Pudding Recipe is about to become your new best friend in the kitchen.
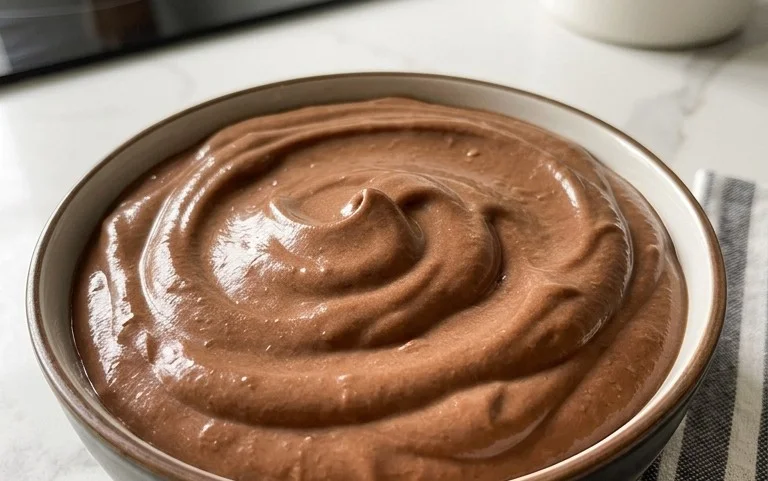
Chocolate Protein Pudding Recipe
Are you craving a rich, decadent dessert that’s also packed with protein to keep you feeling full and satisfied? Look no further! This Chocolate Protein Pudding recipe is a game-changer. It’s incredibly easy to make, requires minimal ingredients, and the result is a thick, creamy, and intensely chocolatey pudding that feels like a luxurious treat, but is secretly a powerhouse of nutrition. Perfect for a post-workout snack, a healthy dessert, or even a satisfying breakfast, this pudding will quickly become a staple in your kitchen. Forget those store-bought puddings loaded with sugar and artificial ingredients; this homemade version is wholesome and delicious.
Ingredients:
This recipe is designed for versatility and ease. The Greek yogurt forms the creamy base, providing a fantastic source of protein and a delightful tang that balances the sweetness. Opting for full-fat yogurt will yield the richest, most luxurious texture, but you can certainly use 2% or even non-fat if you prefer. The type of Greek yogurt you choose – plain or vanilla – will subtly influence the final flavor profile. If you use vanilla Greek yogurt, you might find you need slightly less maple syrup.
The chocolate protein powder is the star of the show, infusing our pudding with that deep chocolate flavor and boosting its protein content significantly. When choosing your protein powder, a good quality whey, casein, or even a plant-based chocolate blend will work wonderfully. The amount of protein powder per scoop can vary between brands, so aim for approximately 2 to 3 tablespoons per scoop to get the right consistency and flavor. If your protein powder is already sweetened, you might want to start with the lower end of the maple syrup measurement and adjust to your taste.
Unsweetened cocoa powder is crucial for intensifying that chocolatey goodness. It adds a depth of flavor that goes beyond what the protein powder alone can provide. The amount can be adjusted based on how rich and dark you like your chocolate. A teaspoon of pure vanilla extract enhances all the flavors, adding a subtle warmth and complexity that rounds out the pudding beautifully. Finally, a touch of maple syrup provides a natural sweetness. You can substitute this with honey, agave nectar, or your preferred liquid sweetener. Start with two tablespoons and add more if you desire a sweeter pudding.
Cooking Instructions
Phase 1: Combining the Base
The beauty of this chocolate protein pudding lies in its simplicity. There’s no cooking involved in the traditional sense, making it incredibly quick to prepare. We’ll start by getting all of our dry and wet ingredients ready.
1. Begin extract by scooping the 5 cups of Greek yogurt into a large mixing bowl. If you’re using plain Greek yogurt, you can add the 1 teaspoon of vanilla extract directly into the bowl with the yogurt at this stage. If you’re using vanilla Greek yogurt, you can skip adding the separate vanilla extract or add it for an extra punch of flavor, as it won’t interfere with the outcome. Take a moment to appreciate the thick, creamy texture of the yogurt; this is the foundation of our delicious pudding.
2. Next, add the 3 to 4 tablespoons of unsweetened cocoa powder to the bowl with the yogurt. I like to start with 3 tablespoons and then taste the mixture later before adding the full 4, especially if I’m not sure how strong my protein powder’s chocolate flavor is. Sifting the cocoa powder can help prevent lumps, but if you don’t have a sieve handy, don’t worry; vigorous mixing will take care of any small clumps.
3. Now, it’s time to incorporate the chocolate protein powder. Add all 4 scoops of your chosen chocolate protein powder into the bowl. This is where the magic really starts to happen, as the protein powder will not only add a significant protein boost but also contribute to the rich chocolate flavor and help thicken the pudding.
Phase 2: Blending to Perfection
Once all the ingredients are in the bowl, the next step is to bring them together into a smooth, homogenous pudding. Patience and thoroughness here will ensure the best texture.
4. Using a whisk or a sturdy spatula, begin extract to mix all the ingredients together. This initial mixing will be a bit challengin extractg as the ingredients are quite thick. You’ll want to break down the clumps of cocoa powder and protein powder and ensure they are fully incorporated into the yogurt. Scrape down the sides and bottom of the bowl frequently to make sure no dry ingredients are left behind. It might look a little lumpy at first, and that’s perfectly normal. Keep stirring and folding until most of the larger lumps have disappeared. Don’t be afraid to use a bit of elbow grease here; the thicker the mixture, the more effort it will take, but the reward is worth it.
5. Once the mixture is relatively well combined and the initial lumps are mostly broken down, it’s time to add the sweetener. Drizzle in the 2 tablespoons of maple syrup. If you prefer a sweeter pudding, you can add up to 4 tablespoons, or even more, to suit your personal preference. After adding the maple syrup, continue to mix thoroughly. At this stage, you should notice the mixture becoming smoother and more pudding-like. Keep mixing until the pudding reaches your desired consistency – thick, creamy, and free of any dry pockets of powder. Taste the pudding at this point and adjust the sweetness or cocoa powder if needed. If it’s not chocolatey enough for you, add another half tablespoon of cocoa powder. If it’s not sweet enough, add another tablespoon of maple syrup.
Phase 3: Chilling and Serving
This pudding is best served chilled, allowing the flavors to meld and the texture to firm up even further.
6. Once you’re happy with the taste and consistency of your chocolate protein pudding, it’s time to let it chill. You can transfer the pudding into individual serving dishes, ramekins, or a larger container. Cover the dishes tightly with plastic wrap or lids to prevent a skin from forming on top. Place the pudding in the refrigerator for at least 30 minutes. For an even thicker and more solidified pudding, chilling it for an hour or more is recommended. The chilling process allows the ingredients to set and the flavors to develop, resulting in a truly satisfying dessert.
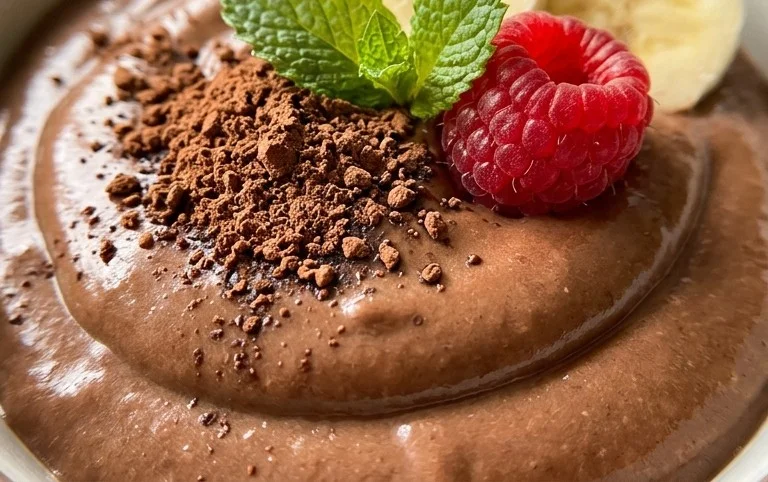
This Chocolate Protein Pudding is incredibly versatile. Enjoy it as is, or get creative with toppings! A dollop of whipped cream (dairy or non-dairy), fresh berries like raspberries or strawberries, a sprinkle of chia seeds, a few dark chocolate chips, or even a drizzle of extra maple syrup can elevate this simple pudding into something truly special. This recipe is proof that you can have your cake – or in this case, pudding – and eat it too, all while supporting your health and fitness goals. Enjoy!
Conclusion:
So there you have it – a delicious and incredibly satisfying Chocolate Protein Pudding Recipe that’s perfect for anyone looking for a healthy treat or a post-workout refuel. This recipe truly shines because it manages to be both decadent and good for you, hitting all the right notes with its rich chocolate flavor and creamy texture without the guilt. It’s remarkably simple to whip up, making it an ideal option for busy weeknights or when you need a quick dessert fix. Don’t hesitate to get creative with your toppings! I love mine with a sprinkle of fresh berries, a dollop of Greek yogurt, or even a few chopped nuts for extra crunch and healthy fats. If you’re feeling adventurous, consider adding a pinch of chili powder for a Mexican chocolate twist, or a swirl of peanut butter for a classic combination. I truly encourage you to give this recipe a try; I’m confident you’ll be delighted by how easy it is to create such a wholesome and delicious pudding.
Frequently Asked Questions:
Can I make this pudding ahead of time?
Absolutely! This Chocolate Protein Pudding Recipe is perfect for meal prep. You can store it in individual airtight containers in the refrigerator for up to 3-4 days. The flavors often meld even further overnight, making it even more delicious!
What kind of protein powder works best?
Whey protein powder is a popular choice and yields a lovely creamy texture. However, you can also use casein, a plant-based blend (like pea or brown rice), or even collagen peptides. Keep in mind that different protein powders absorb liquid differently, so you might need to adjust the amount of liquid slightly to achieve your desired pudding consistency.
Chocolate Protein Pudding Recipe
A quick and easy high-protein chocolate pudding, perfect for a healthy dessert or snack.
Ingredients
-
5 cups Greek yogurt (full-fat, plain or vanilla)
-
4 scoops chocolate protein powder
-
3 to 4 tablespoons unsweetened cocoa powder
-
1 teaspoon vanilla extract
-
2 tablespoons maple syrup
Instructions
-
Step 1
In a medium bowl, combine the Greek yogurt and chocolate protein powder. -
Step 2
Add the unsweetened cocoa powder and vanilla extract. -
Step 3
Drizzle in the maple syrup. -
Step 4
Stir all ingredients together until well combined and smooth. For a thicker consistency, add a little more protein powder. For a thinner consistency, add a splash of milk. -
Step 5
Divide the pudding into serving dishes or containers. -
Step 6
Chill in the refrigerator for at least 15-30 minutes before serving, or until firm.
Important Information
Nutrition Facts (Per Serving)
It is important to consider this information as approximate and not to use it as definitive health advice.
Allergy Information
Please check ingredients for potential allergens and consult a health professional if in doubt.