Easy Japanese Tuna Onigiri Quick Recipe
15-min. Easy Japanese Tuna Onigiri are your new best friend for those frantic weeknights or lazy weekend mornings. Who doesn’t love a quick, satisfying meal that feels both healthy and incredibly delicious? That’s the magic of onigiri! These delightful rice balls, often found tucked into bento boxes or enjoyed as a portable snack, are a staple in Japanese cuisine for a reason. What makes our 15-min. Easy Japanese Tuna Onigiri so special is the perfect balance of fluffy, seasoned rice and a savory, umami-rich tuna filling. It’s a deceptively simple dish that packs a punch of flavor, offering a comforting and nourishing bite that’s ready in a flash. You’ll be amazed at how a few basic ingredients can transform into such a crowd-pleasing treat.
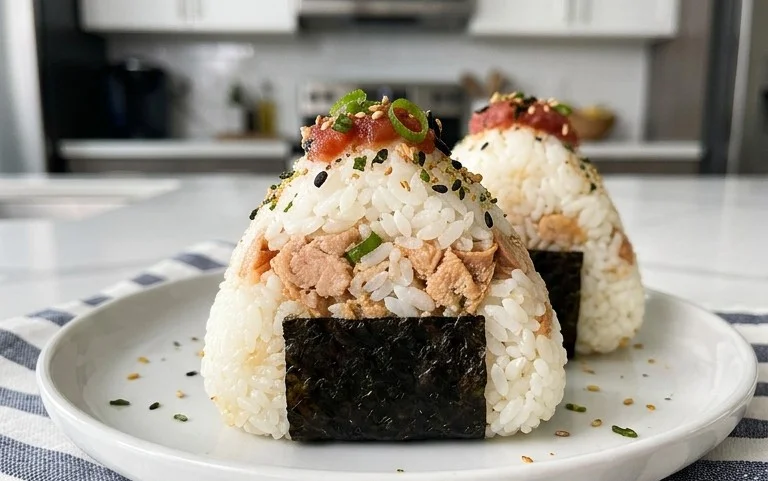
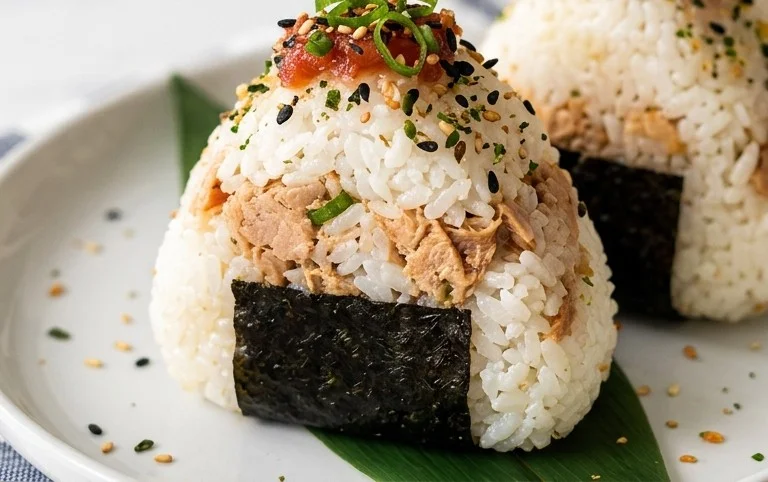
15-Min. Easy Japanese Tuna Onigiri
Tuna onigiri, or Japanese rice balls, are a staple of quick lunches, bento boxes, and satisfying snacks. They’re incredibly versatile, portable, and surprisingly filling. What makes this recipe truly special is its speed. We’re talking about delicious, homemade tuna onigiri ready in just 15 minutes! This is perfect for those busy mornings or when a craving strikes and you need something wholesome and tasty in a flash. The combination of savory tuna, creamy Japanese mayonnaise, and perfectly seasoned rice is simply irresistible. Let’s get started on making these delightful little rice parcels.
Ingredients:
Instructions:
1. Prepare the Tuna Filling
The first step to creating our flavorful tuna onigiri is to prepare the filling. Open your can of tuna. If you’re using tuna packed in oil, drain off most of the oil, but leave a little behind for extra moisture and flavor. If you’re using tuna packed in water, drain it thoroughly. Transfer the drained tuna to a small bowl. Add the 2 tablespoons of Japanese mayonnaise to the tuna. Japanese mayonnaise, like Kewpie, has a richer, tangier flavor and a creamier texture than regular mayonnaise, which I highly recommend for the best results, but regular mayo will work in a pinch. Use a fork to gently flake the tuna and mix it thoroughly with the mayonnaise until it’s well combined and forms a creamy, spreadable mixture. You can add a tiny pinch of black pepper at this stage if you like, though it’s entirely optional.
2. Season the Rice
While you’re preparing the tuna, your short-grain rice should ideally be cooked and slightly cooled. If you’re using freshly cooked rice, make sure it’s still warm but not scalding hot, as this helps with shaping the onigiri. In a medium bowl, combine the 2 cups of cooked short-grain rice with the 1/2 teaspoon of salt. Gently toss the rice with a spatula or rice paddle to evenly distribute the salt. Avoid over-mixing, as this can make the rice mushy. The salt is crucial for bringin extractg out the natural sweetness of the rice and adding a foundational layer of flavor to your onigiri. Taste a grain of rice to ensure the seasoning is just right; it should be subtly seasoned, not overtly salty.
3. Assemble the Onigiri
Now comes the fun part: shaping! Dampen your hands with water – this is a crucial step to prevent the rice from sticking to your hands. You can also lightly salt your hands if you wish. Take about 1/4 cup of the seasoned rice and place it in the palm of your hand. Create a small indentation in the center of the rice. Spoon about 1 tablespoon of the prepared tuna filling into this indentation. Now, gently bring the edges of the rice up and around the filling, enclosing it completely. Start shaping the rice into a ball or a triangle. For a triangle shape, which is classic for onigiri, use your other hand to cup the shape and your fingertips to gently press and form the corners and sides. Don’t press too hard, or the rice will become dense. The goal is a compact but still fluffy onigiri. Repeat this process until all the rice and filling are used, aiming to make them roughly the same size.
4. Wrap with Nori
Once your onigiri are shaped, it’s time to add the nori. If you’re using full sheets of nori, you’ll likely want to cut them into strips about 1 inch wide and 3-4 inches long. This size is perfect for wrapping around the base of a triangle or ball-shaped onigiri, providing a nice grip and a burst of oceanic flavor. If you prefer less nori, you can simply cut your sheets into smaller pieces or use just half a sheet per onigiri. Take a strip of nori and wrap it around the bottom of an onigiri. The moisture from the rice should help it adhere. You can also moisten the very tip of the nori with a tiny bit of water to secure the end. The nori not only adds flavor and visual appeal but also acts as a handy wrapper, making it easier to hold and eat your onigiri.
5. Garnish and Serve (Optional)
For an extra touch of flavor and visual appeal, we can add the optional sesame seeds. If you’re using them, gently press a few toasted sesame seeds onto the top or sides of your onigiri. Toasting the sesame seeds beforehand, even for just a minute in a dry pan, really brings out their nutty aroma and flavor. Your 15-minute tuna onigiri are now ready to be enjoyed! These are best eaten fresh, but they will keep for a few hours at room temperature or in the refrigerator (though the nori can become a bit chewier when refrigerated). They are perfect for a quick lunch, a light dinner, or as part of a larger bento. Enjoy this simple yet satisfying Japanese treat!
Conclusion:
There you have it – a delicious and incredibly simple way to make Japanese Tuna Onigiri in just 15 minutes! This recipe is a fantastic go-to for busy weeknights, quick lunches, or even as a satisfying snack. The beauty of onigiri lies in its versatility and the minimal effort required for such a rewarding result. The combination of fluffy rice, savory tuna filling, and the optional touch of nori is pure comfort food at its finest.
I highly recommend serving these delightful rice balls as they are, perhaps with a side of miso soup for a complete meal. They also make an excellent addition to bento boxes or picnics. Don’t be afraid to experiment with variations! Try adding a drizzle of soy sauce or a sprinkle of sesame seeds to the rice before forming, or incorporate other fillings like cooked salmon or a spicy mayo mixture. The possibilities are truly endless.
I encourage you to give this 15-min. Easy Japanese Tuna Onigiri recipe a try. I’m confident you’ll love how quick and satisfying it is to create this authentic Japanese treat. It’s a wonderful way to bring a taste of Japan into your own kitchen without needing a lot of time or fancy ingredients.
Frequently Asked Questions about Japanese Tuna Onigiri:
Can I make the rice ahead of time for this recipe?
Yes, you absolutely can! Cooked and cooled rice can be stored in the refrigerator for up to 2 days. Gently reheat it in the microwave or pan-fry it slightly before using to make your onigiri, ensuring it’s still warm enough to mold.
What kind of tuna is best for this onigiri filling?
Canned tuna packed in oil or water works perfectly. Drain it very well before mixing with your mayonnaise and seasonings to prevent the onigiri from becoming soggy. Tuna with a firmer texture tends to hold its shape better.
15-min. Easy Japanese Tuna Onigiri
Quick and simple Japanese rice balls filled with seasoned tuna and mayonnaise, perfect for a light meal or snack.
Ingredients
-
2 cups cooked short grain rice
-
1/2 tsp salt
-
5.29 oz canned tuna (in oil recommended, or canned tuna in water)
-
2 tbsp Japanese mayo (or regular mayonnaise)
-
2 sheets nori (or use 1/2 sheet if you prefer less)
-
1 tsp sesame seeds (for garnishing, optional)
Instructions
-
Step 1
In a bowl, gently mix the cooked short grain rice with salt. Let it cool slightly so it’s comfortable to handle. -
Step 2
Drain the canned tuna very well. In a separate small bowl, flake the tuna and mix it with the Japanese mayonnaise until well combined. -
Step 3
Wet your hands with water and a pinch of salt to prevent sticking. Take about 1/2 cup of the seasoned rice and flatten it in your palm. -
Step 4
Place a spoonful of the tuna-mayo mixture in the center of the flattened rice. Carefully shape the rice around the filling to form a ball or triangle, ensuring the filling is enclosed. -
Step 5
Cut the nori sheets into desired shapes for wrapping (e.g., strips for the sides or a small flag on top). Wrap the onigiri with the nori. -
Step 6
Optional: Garnish the onigiri with sesame seeds.
Important Information
Nutrition Facts (Per Serving)
It is important to consider this information as approximate and not to use it as definitive health advice.
Allergy Information
Please check ingredients for potential allergens and consult a health professional if in doubt.